If Figma is a main player in your UX/UI tool stack, you may be excited to learn that this versatile platform now comes with some AI superpowers.
Figma is investing heavily in AI, with the goal of empowering designers to work faster, level up their problem-solving abilities, and ultimately create even better user experiences.
So what exactly is Figma AI and how can you use it to supercharge your UX process? Keep reading to discover the best AI features, functions, and plugins for Figma and FigJam.
What is Figma AI and how can you use it?
Back in June 2023, Noah Levin, Vice President of Product Design at Figma, wrote about the potential of AI to transform the entire product development process.
In his article, AI: The next chapter in design, Levin anticipates that AI will “play a central role in how teams work in Figma, helping them get to a first draft faster and then design and build through to great products.”
Over the past few years, Figma has established a team dedicated solely to machine learning, and invested heavily in the development of Figma’s AI capabilities.
The Figma community has also been busy building AI-powered plugins to enhance the platform’s functionality and add a touch of AI magic. Now, there are almost 100 AI plugins available for Figma. Impressive!
So, when we talk about Figma AI, we’re referring to:
- AI-powered features that have been developed by Figma’s own team and built into the platform itself (available in FigJam, Figma’s collaborative whiteboard tool).
- AI plugins that have been built by members of the Figma community using Figma’s open API.
Note that, at the time of writing, Figma’s built-in AI features are available in FigJam, while Figma’s AI functionality comes from third-party plugins.
If you’re not familiar, Figma is your standard design and prototyping tool; FigJam is a collaborative digital whiteboard used for brainstorming, meetings, workshops, and planning. Both products are available with all price plans and account types.
With that, let’s explore some of the best AI features, functions, and plugins available in both Figma and FigJam—and how you can use them throughout the design process.
How to make the most of Figma AI: the best features, functions, and plugins
Anyone with a Figma account can use Figma AI. And, unless you’ve manually opted out of beta AI features (in your account settings), you’ll automatically have access to new AI features as soon as they become available.
Ready to unlock Figma’s AI capabilities? Let’s jump in.
1. Generate boards and diagrams with FigJam AI
FigJam is where teams come together to brainstorm, share ideas, align on decisions, and collaborate more efficiently.
Now, thanks to AI, preparing and building FigJam boards for team exercises and workshops has never been easier (or faster).
Instead of manually setting up the individual components of your FigJam board, you can use text prompts to generate whatever canvas you need—be that a meeting board, a workshop exercise, a diagram, mind-map, or flow chart.
How to generate boards and diagrams with FigJam AI:
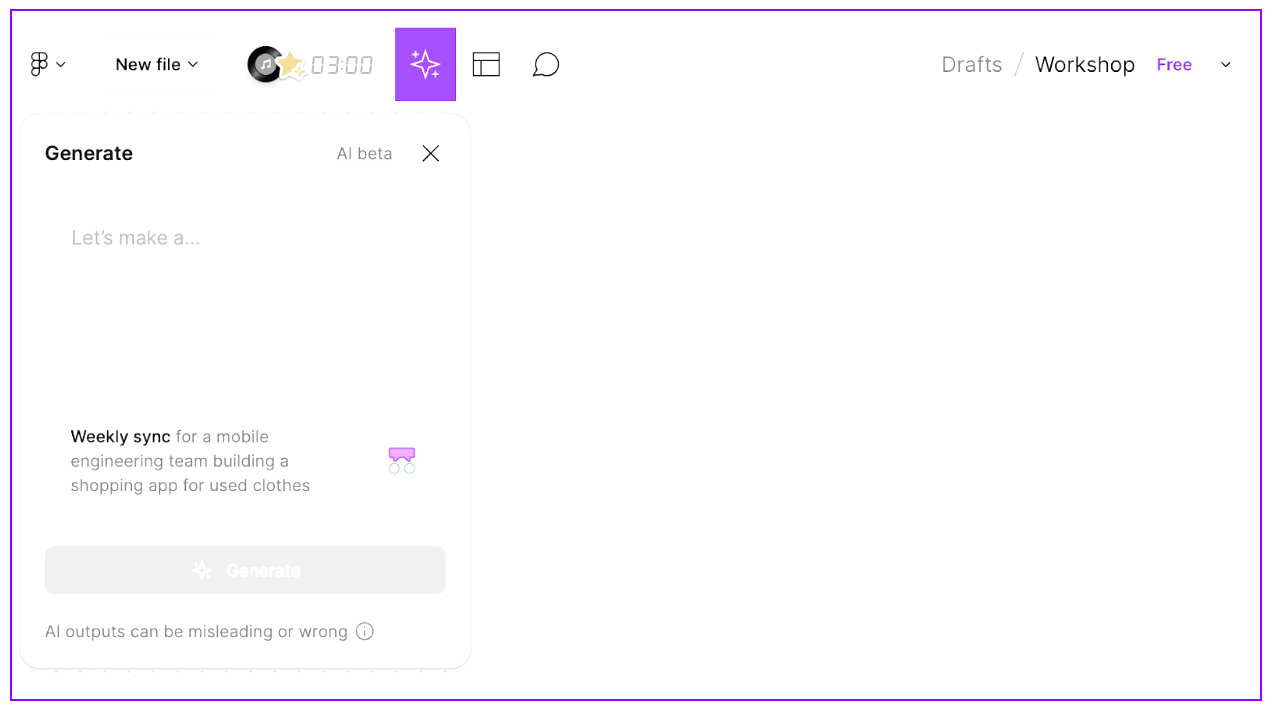
- Open a blank canvas in FigJam and click the ‘Generate’ icon in the top toolbar (the sparkle-style icon next to the timer):
- Select one of the suggested templates that appear in the drop-down, or click the ‘Let’s make a…’ field if you want to prompt the AI to create something unique.
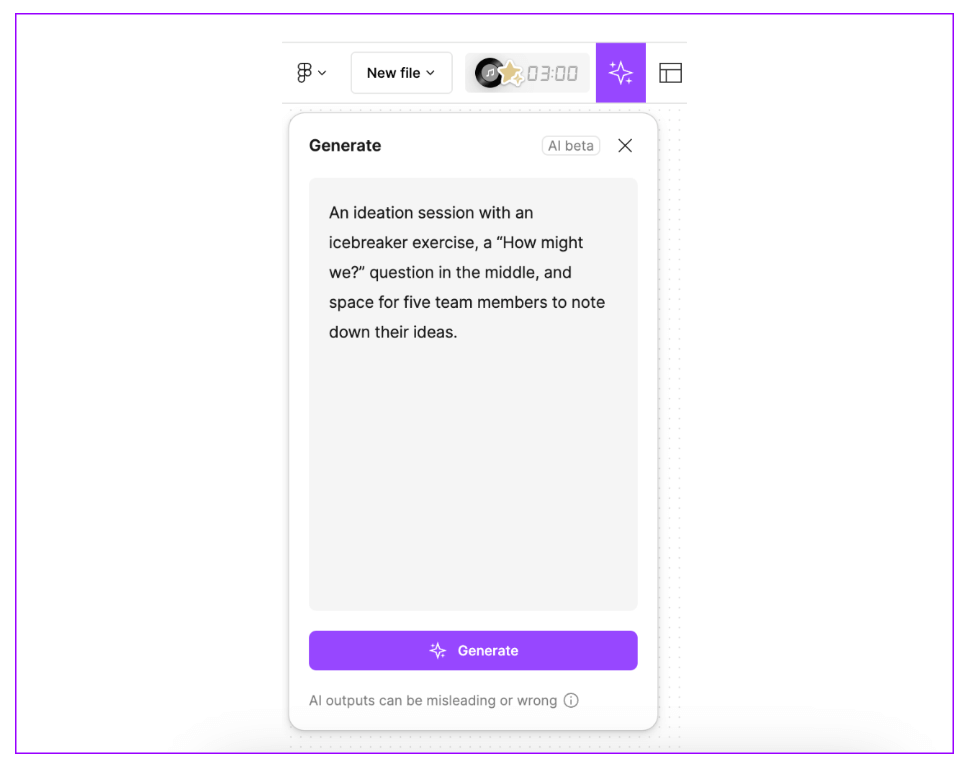
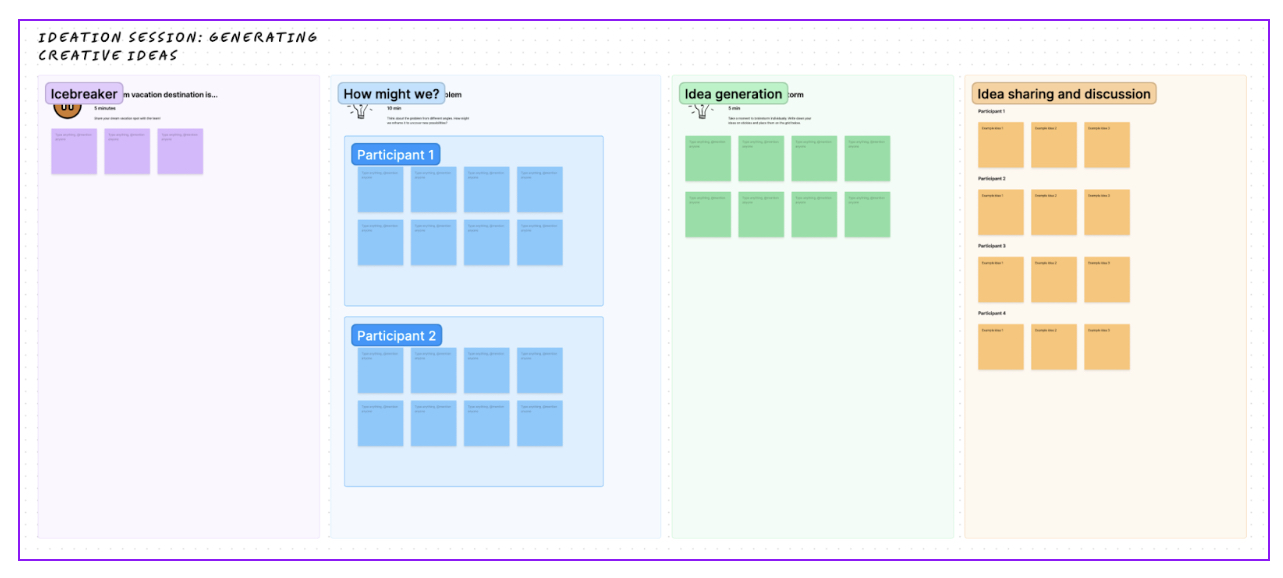
- Type your prompt into the text field. For example: “An ideation session with an icebreaker exercise, a “How might we?” question in the middle, and space for five team members to note down their ideas.”
4. Click ‘Generate’ and watch your board come to life. You can then customise the board to suit your needs, or try a new prompt if the output isn’t quite what you had in mind.
As is always the case with generative AI, the quality and accuracy of the output typically depends on the input. When using FigJam AI for the first time, be prepared to experiment with different prompts to learn what works best.
2. Sort and summarise stickies with FigJam AI
If you’ve ever hosted a collaborative workshop or brainstorming session in FigJam, you’ll know that the most difficult—and most time-consuming—part usually comes after the event when you’re left to organise and make sense of all the resulting sticky notes.
This is where a touch of AI magic can really save you some time. You can use FigJam AI to automatically sort your stickies into categories, and to generate summaries that help you better group and understand the content of your stickies.
Both of these functions are a great help when it comes to synthesising messy, unstructured qualitative data on your FigJam board. Let’s explore how they work.
How to sort sticky notes with FigJam AI:
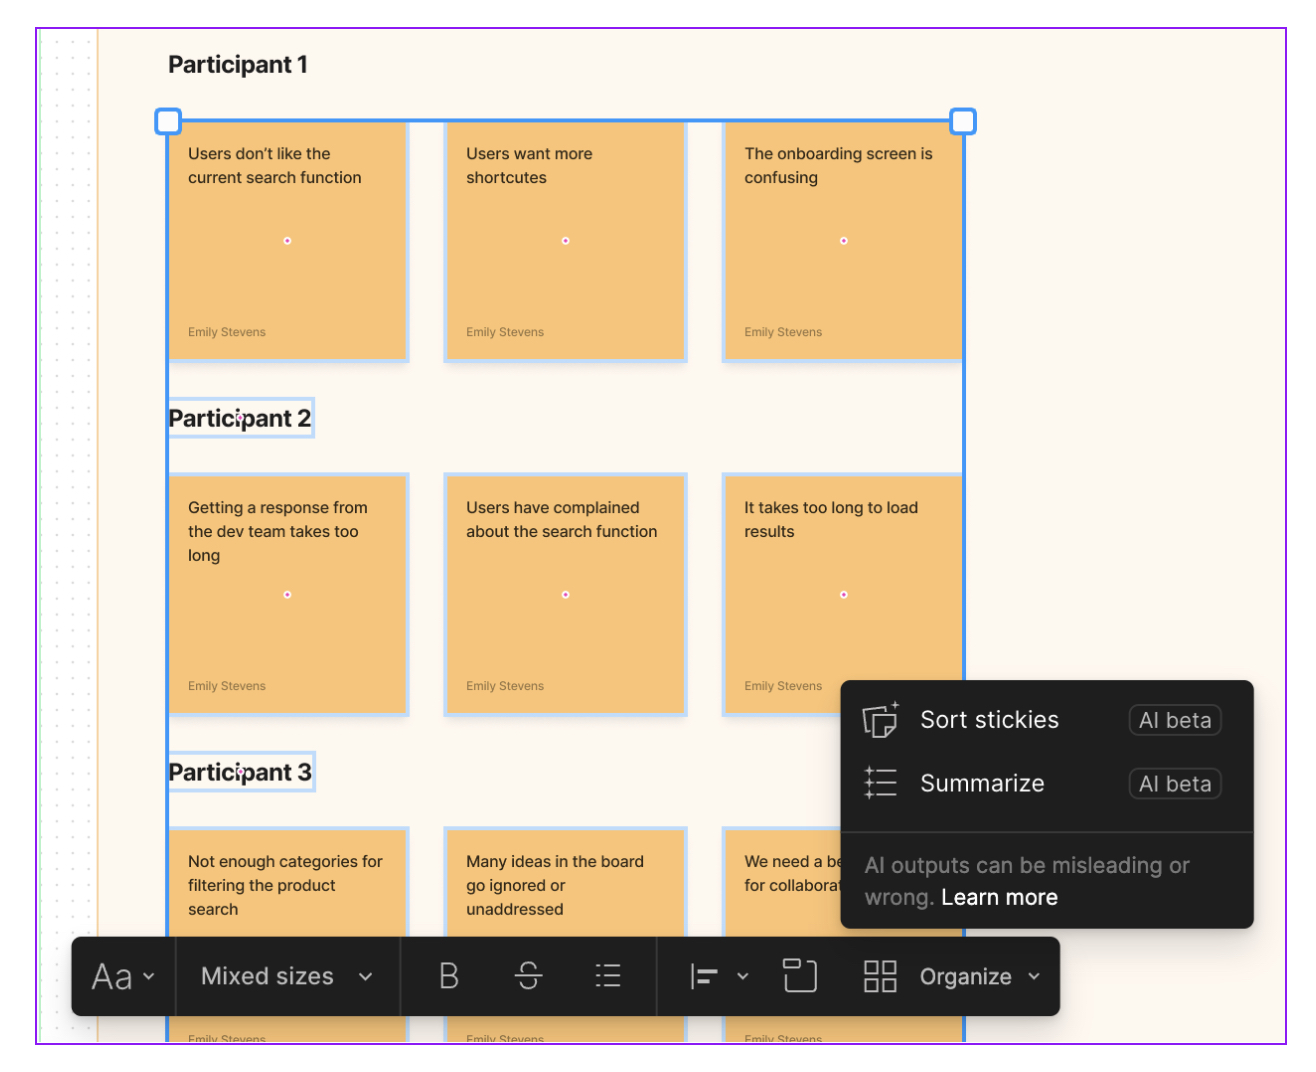
1. Select all the individual sticky notes on your board that you want FigJam AI to sort, then click ‘Organize’ on the toolbar that pops up.
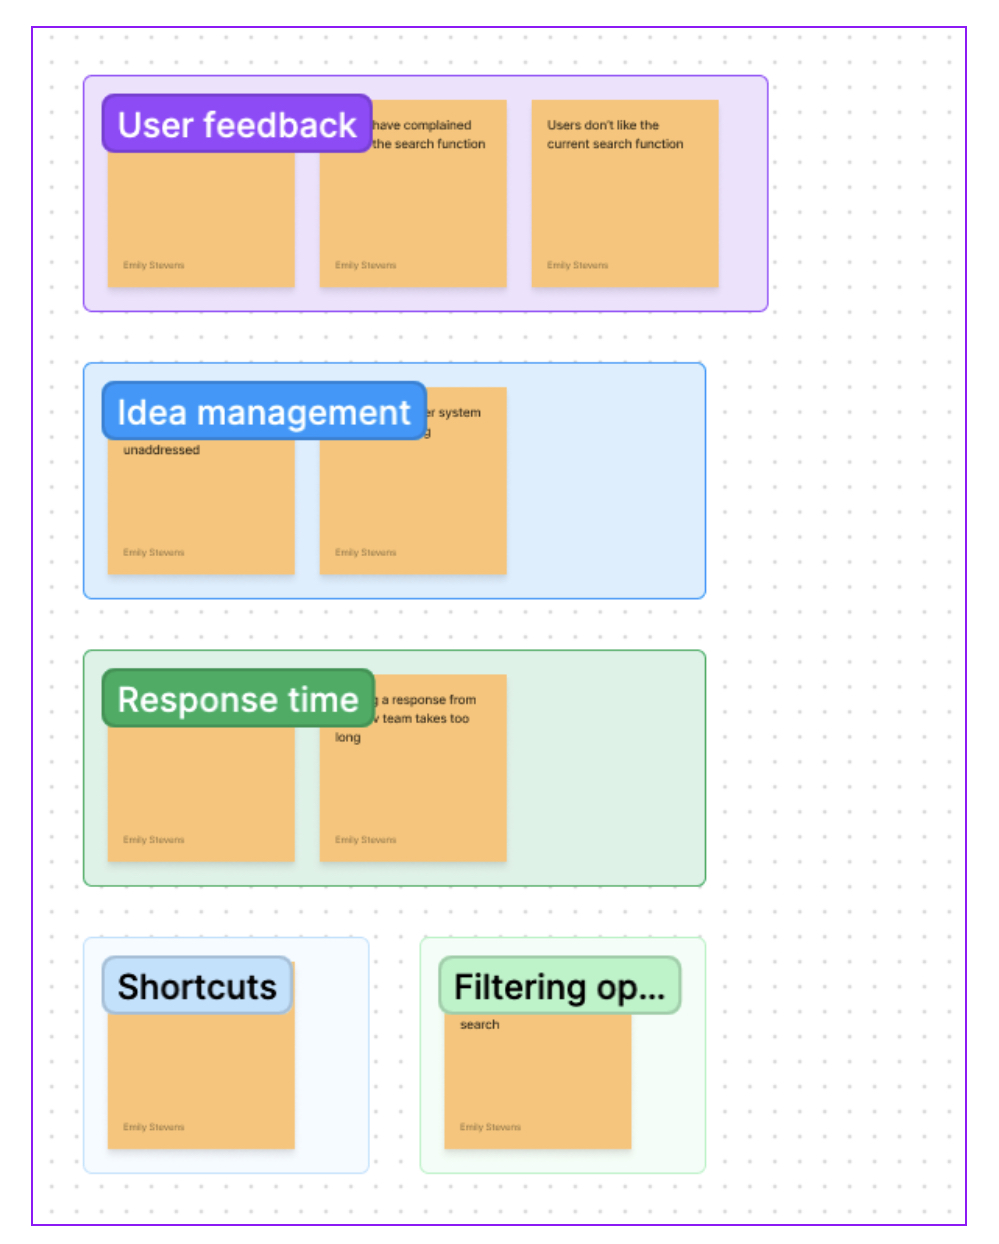
2. You’ll see two options labelled ‘AI beta’. Click on ‘Sort stickies’. FigJam AI will create a copy of each sticky note from your selection and organise them into categories in a new section of the board.
3. Review FigJam AI’s suggested categorisation and manually adjust as necessary. Again, AI outputs can’t be counted on for complete accuracy, so you’ll need to evaluate the results with a critical human eye.
How to summarise sticky notes with FigJam AI:
The second handy AI feature available in FigJam is auto-generating summaries of your sticky note content. To do this:
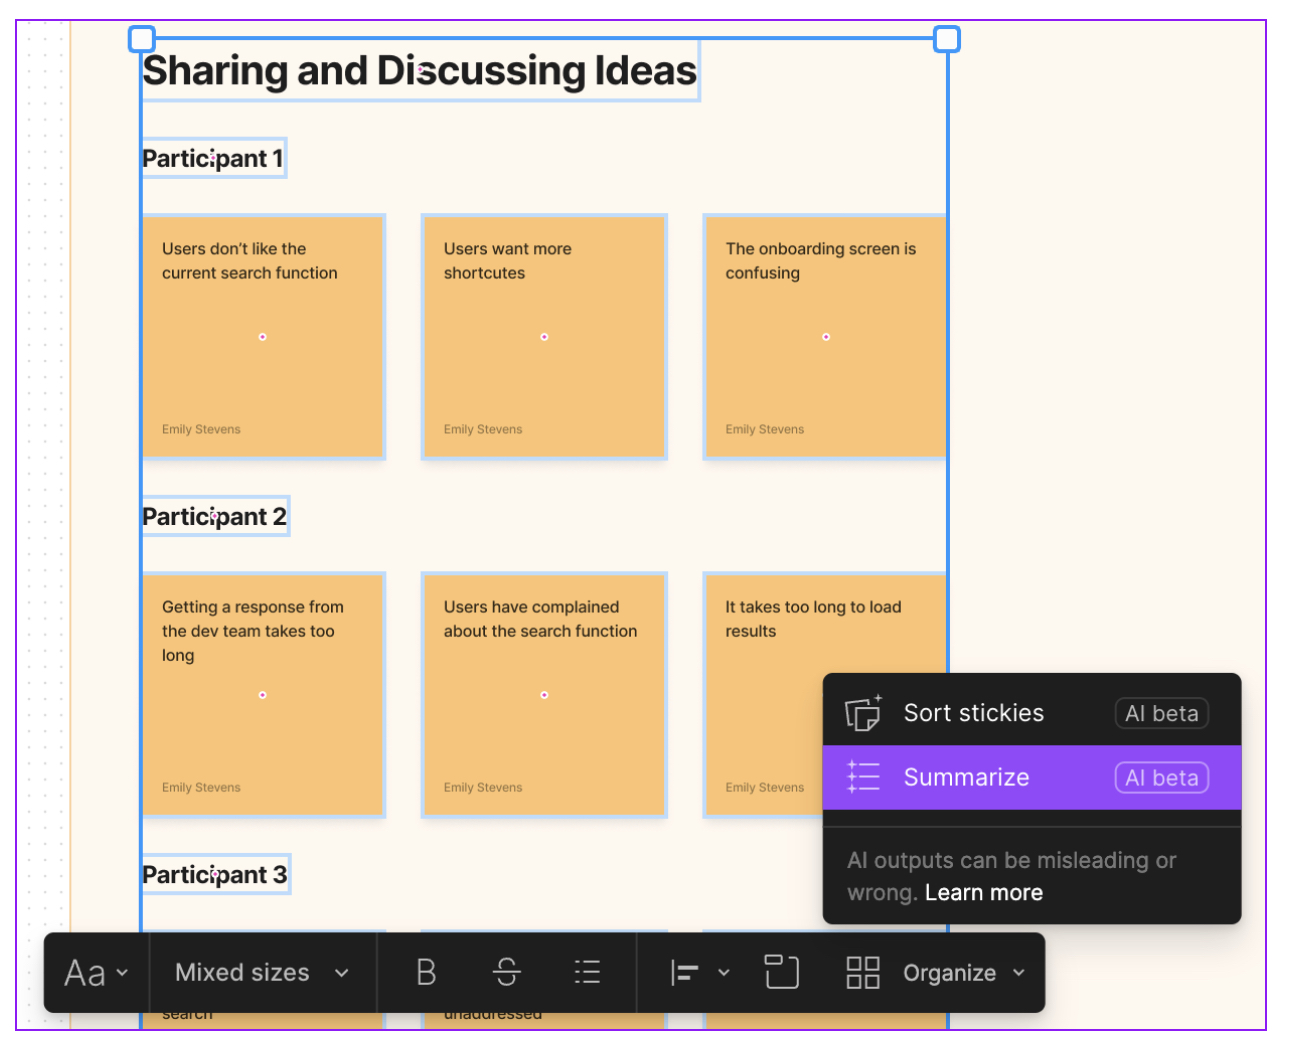
1. Select the sticky notes you want to summarise and then click ‘Organize’ on the toolbar that pops up. This time, select ‘Summarize’ from the dropdown.
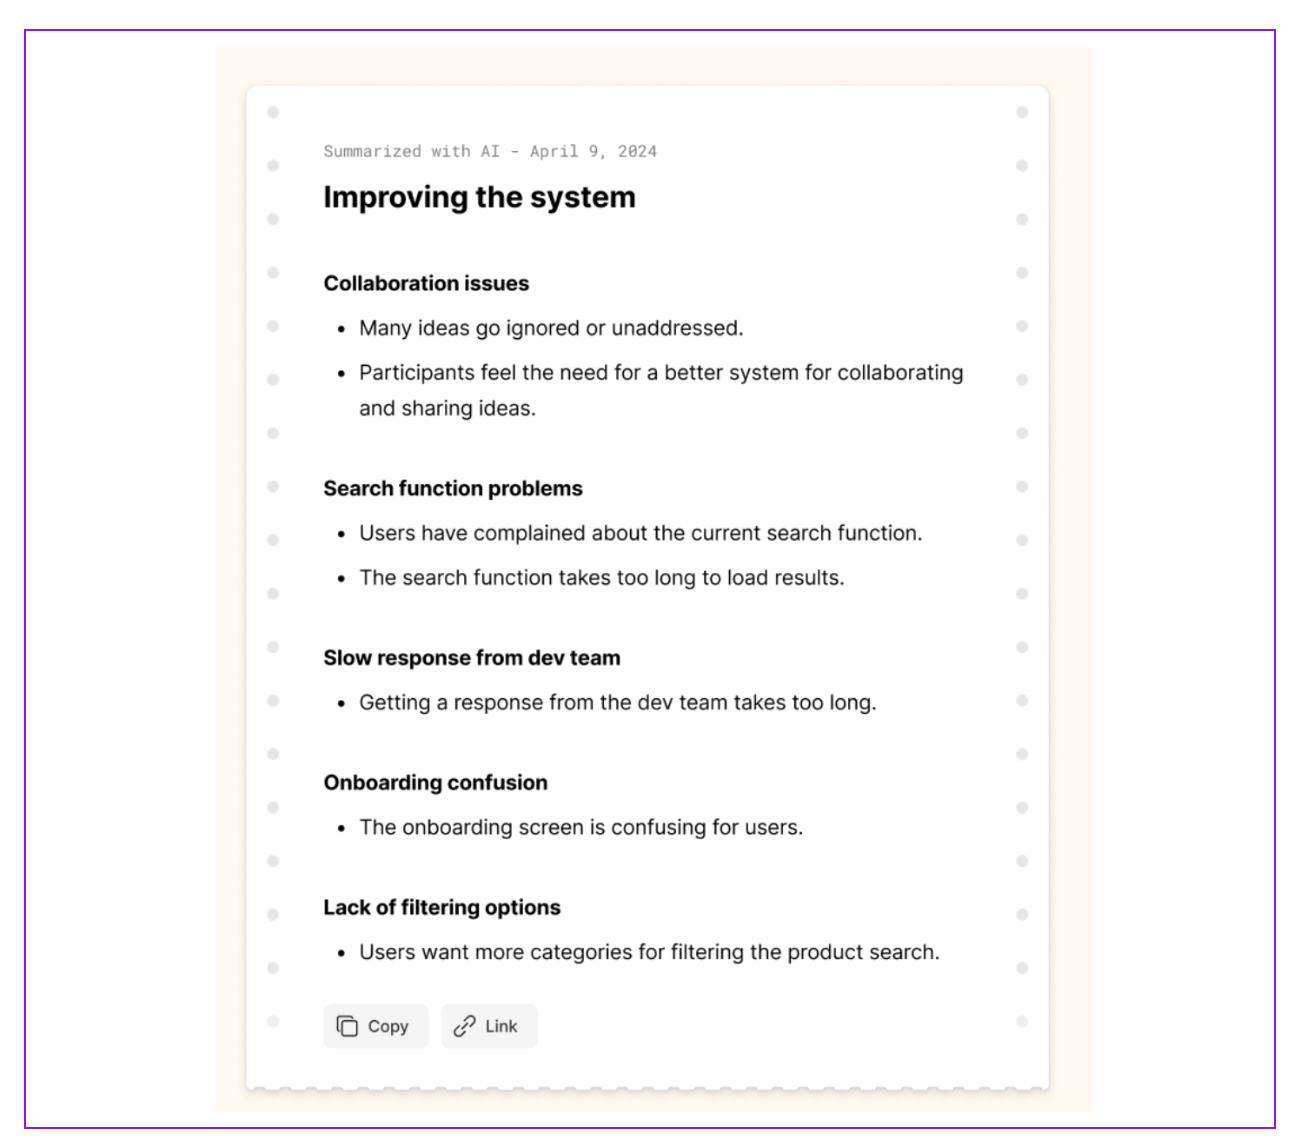
2. FigJam AI will then create a written summary of the content featured on the stickies you highlighted, like so:
It’s not possible to edit these summaries—and, as usual, they might not be completely accurate or logical. However, they provide a great starting point for quickly making sense of the content on your board and understanding the different themes covered within your data.
3. Get creative with Jambot (FigJam’s ChatGPT-style widget)
If you enjoy using ChatGPT as a sparring partner for coming up with ideas, you’ll be pleased to meet Jambot.
Jambot is a FigJam widget that brings the generative power of ChatGPT right to your FigJam boards. First we’ll show you how to find and run the Jambot widget, and then we’ll explore some of the different ways you can use it.
How to find and run the Jambot widget:
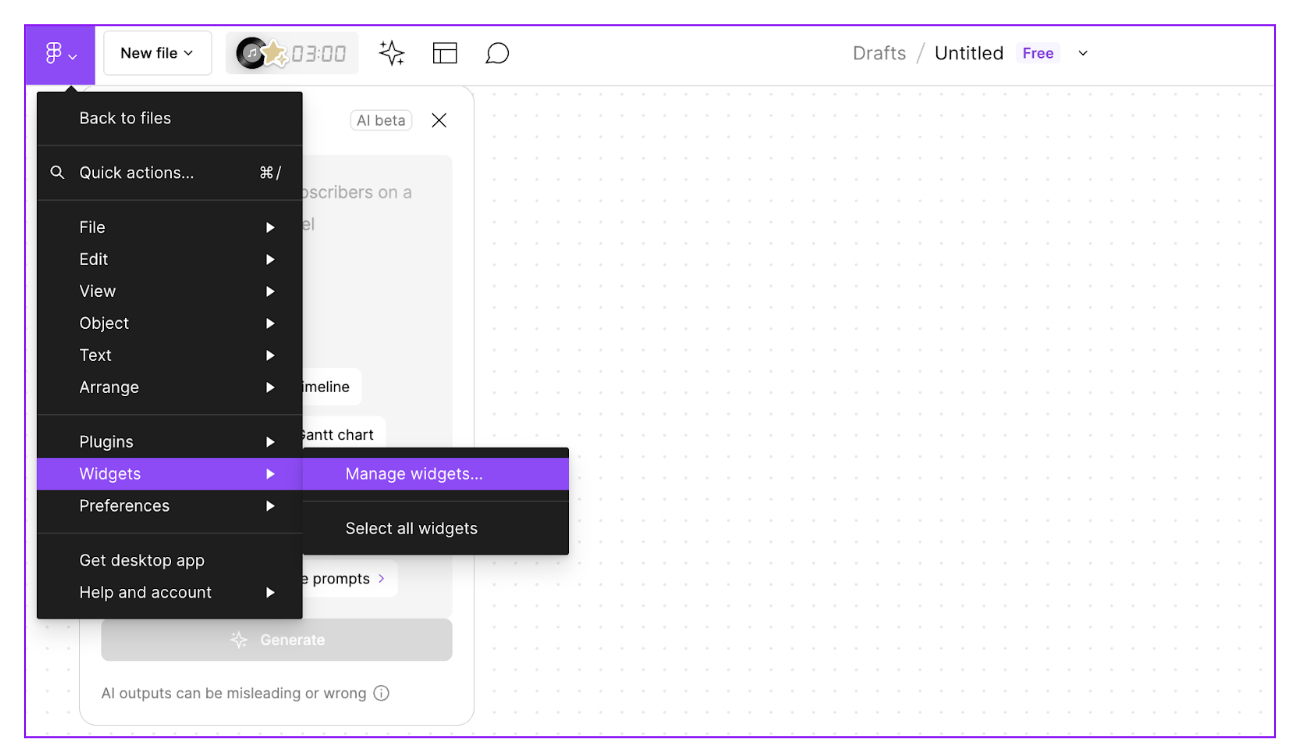
1. In FigJam, navigate to the main menu (the F icon in the top-left corner), select ‘Widgets’ and then click ‘Manage widgets’.
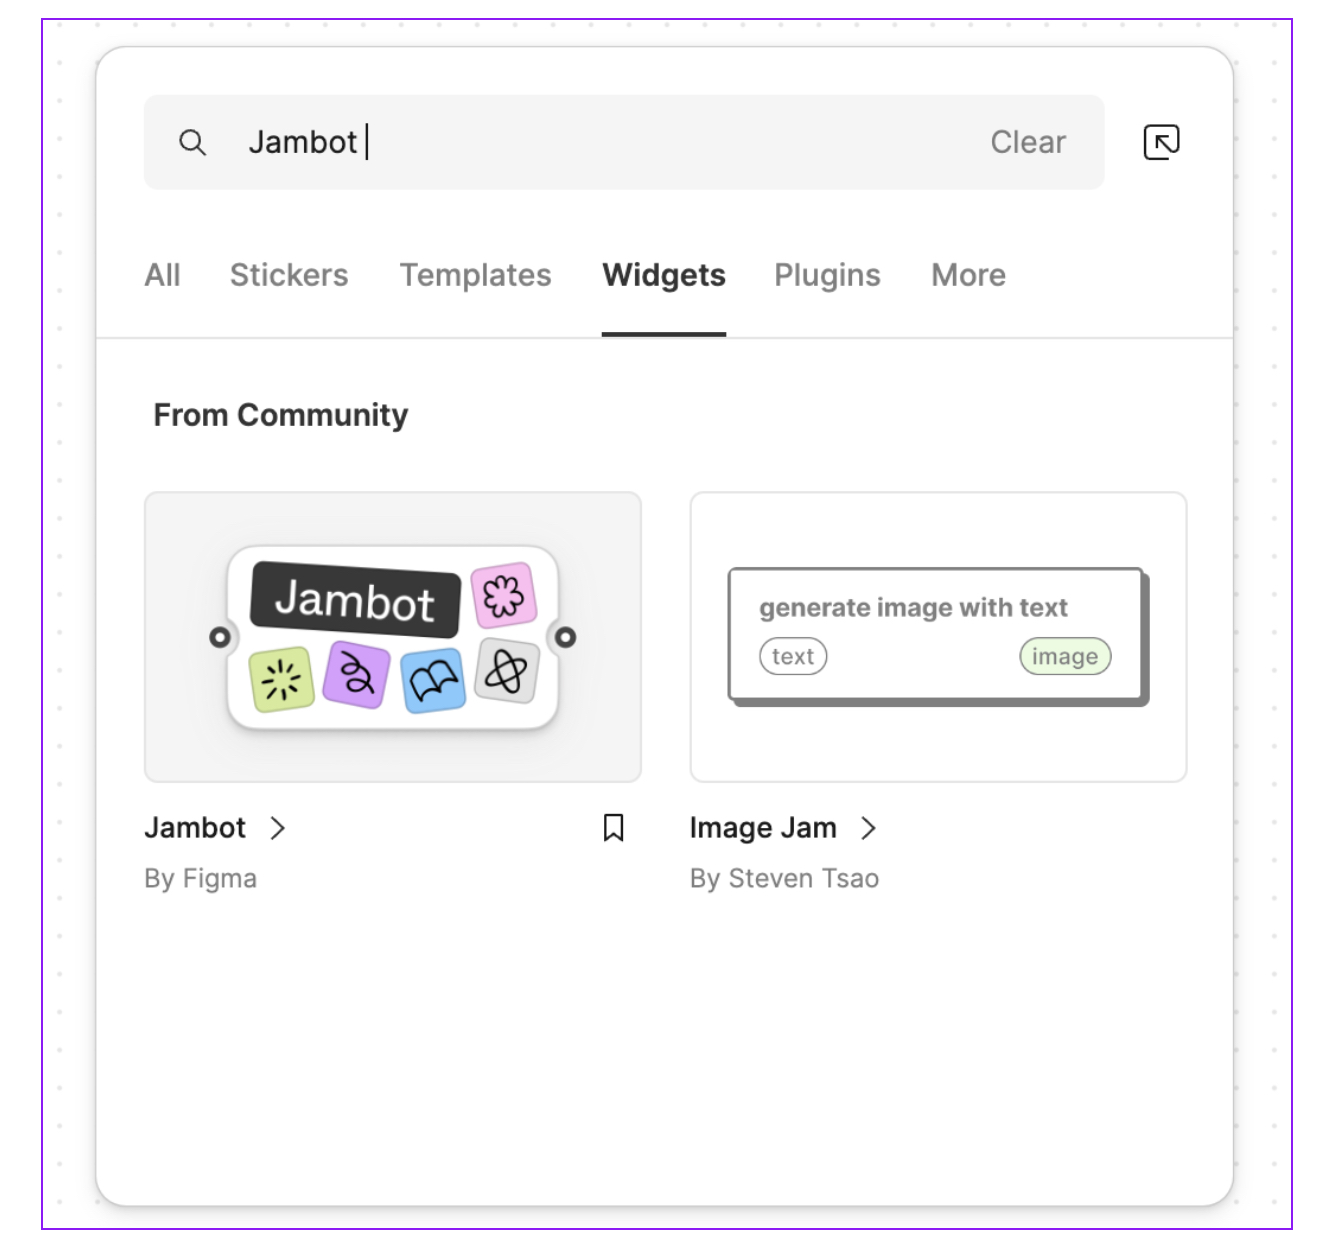
2. Type ‘Jambot’ into the search field and select the Jambot widget by Figma:
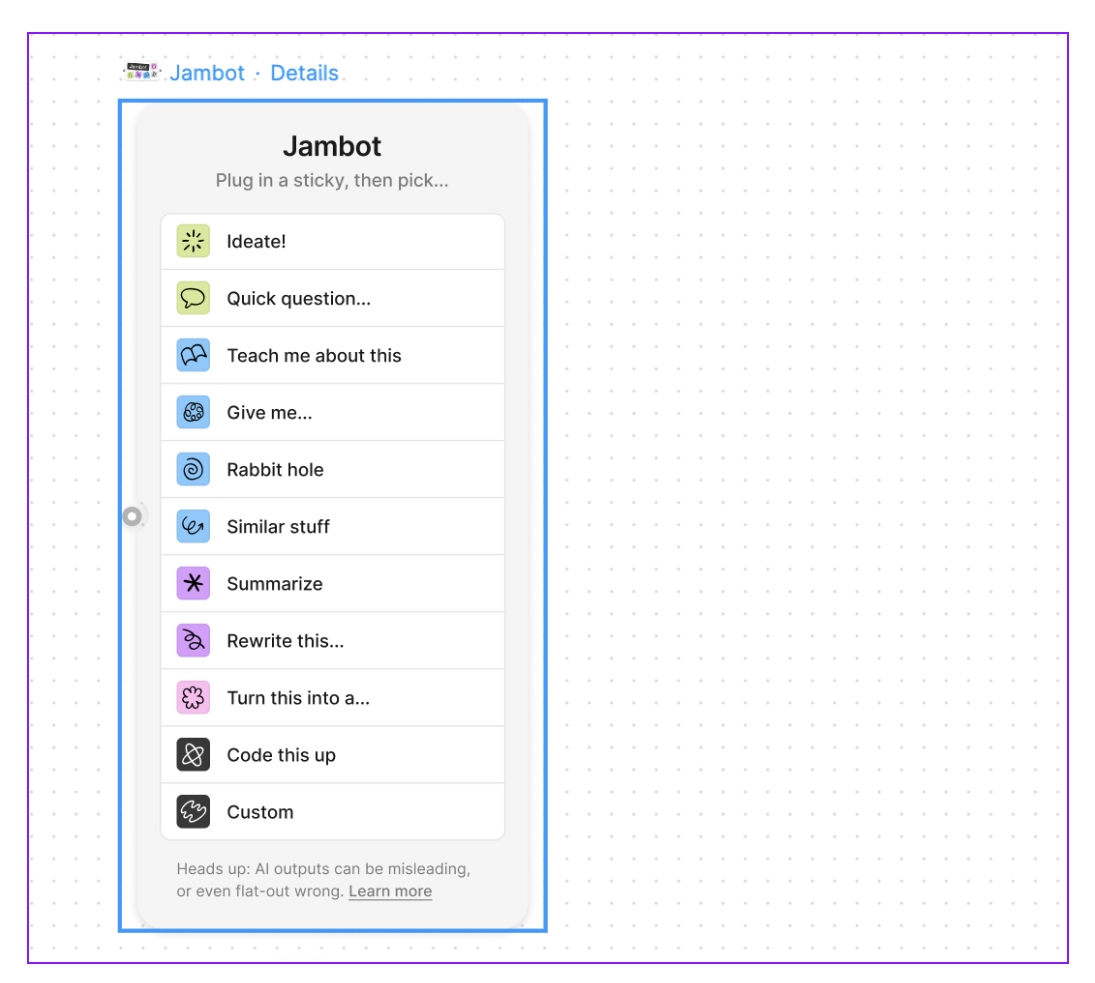
3. The Jambot widget will appear on your board, with a list of available functions:
Now let’s explore some of those functions.
How to ideate with Jambot:
Let’s say you’re planning an ideation session with your team.Here’s how you could use Jambot’s ‘Ideate’ function to support you in the process.
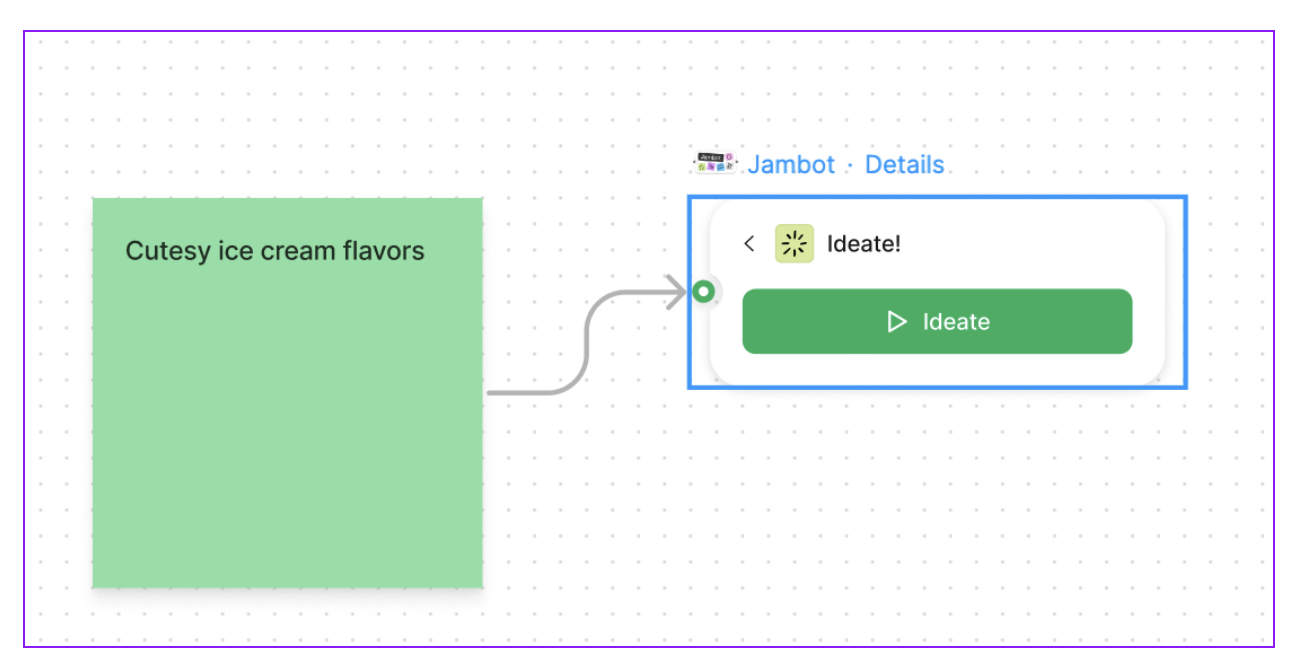
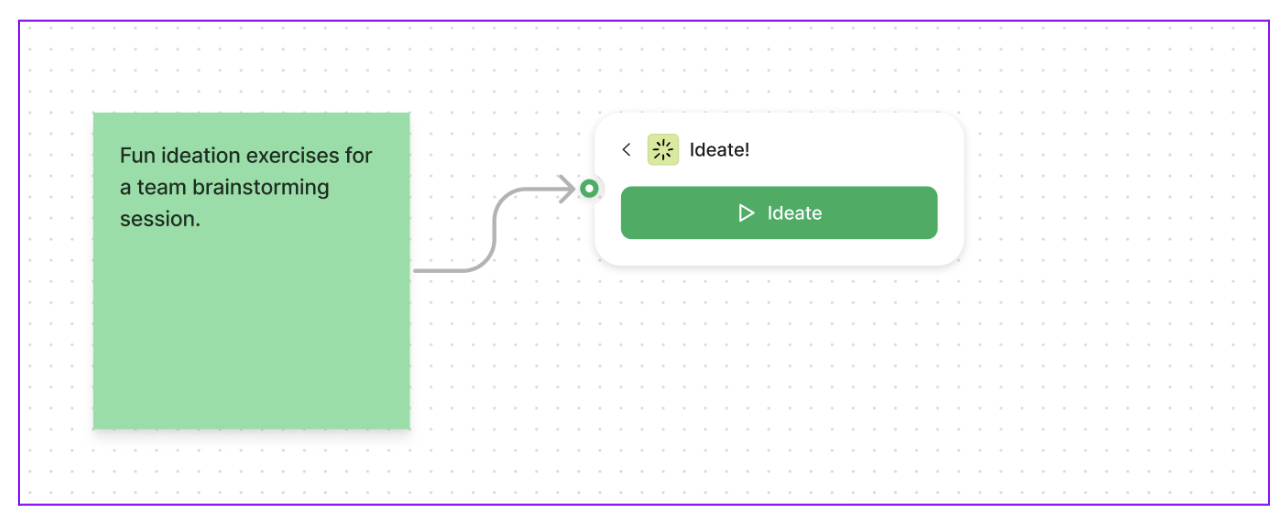
1. Select ‘Ideate’ from the list of available functions. A sticky note will appear with some sample text, which you’re going to edit to put in your own prompt:
2. Double-click on the sticky and type your own prompt, for example: “Fun ideation exercises for a team brainstorming session.” Click ‘Ideate’ to activate the prompt.
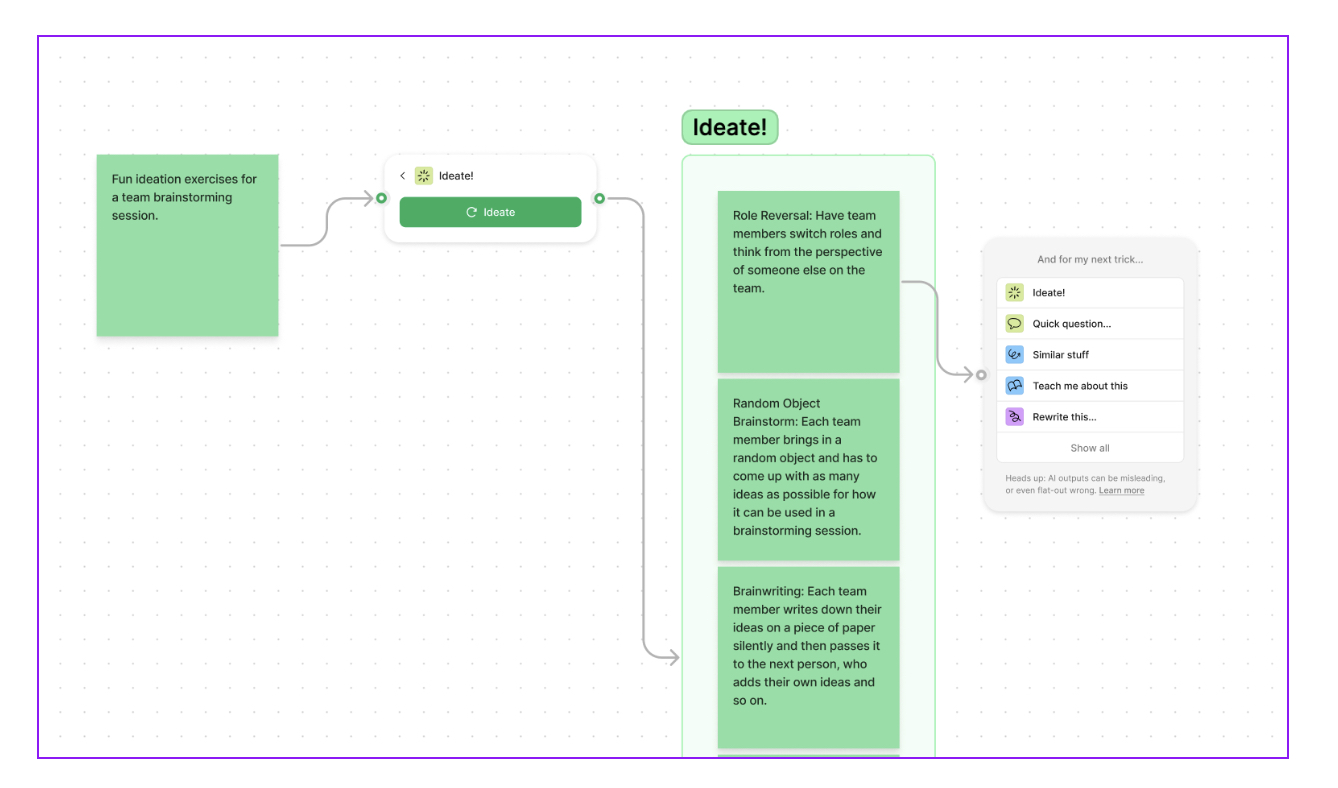
3. Based on your prompt, Jambot will generate a series of new sticky notes with ideas. You can copy individual stickies to a separate board, or run a new prompt if you’re not happy with the output.
How to use Jambot as an educational tool:
Another useful Jambot feature is the ‘Teach me about this’ function. Let’s say you want to learn more about one of the ideation techniques generated as a response to your previous prompt. Here’s how you’d go about it:
1. Select the sticky note whose content you’d like to learn more about, then select ‘Teach me about this’ from the list of available functions:
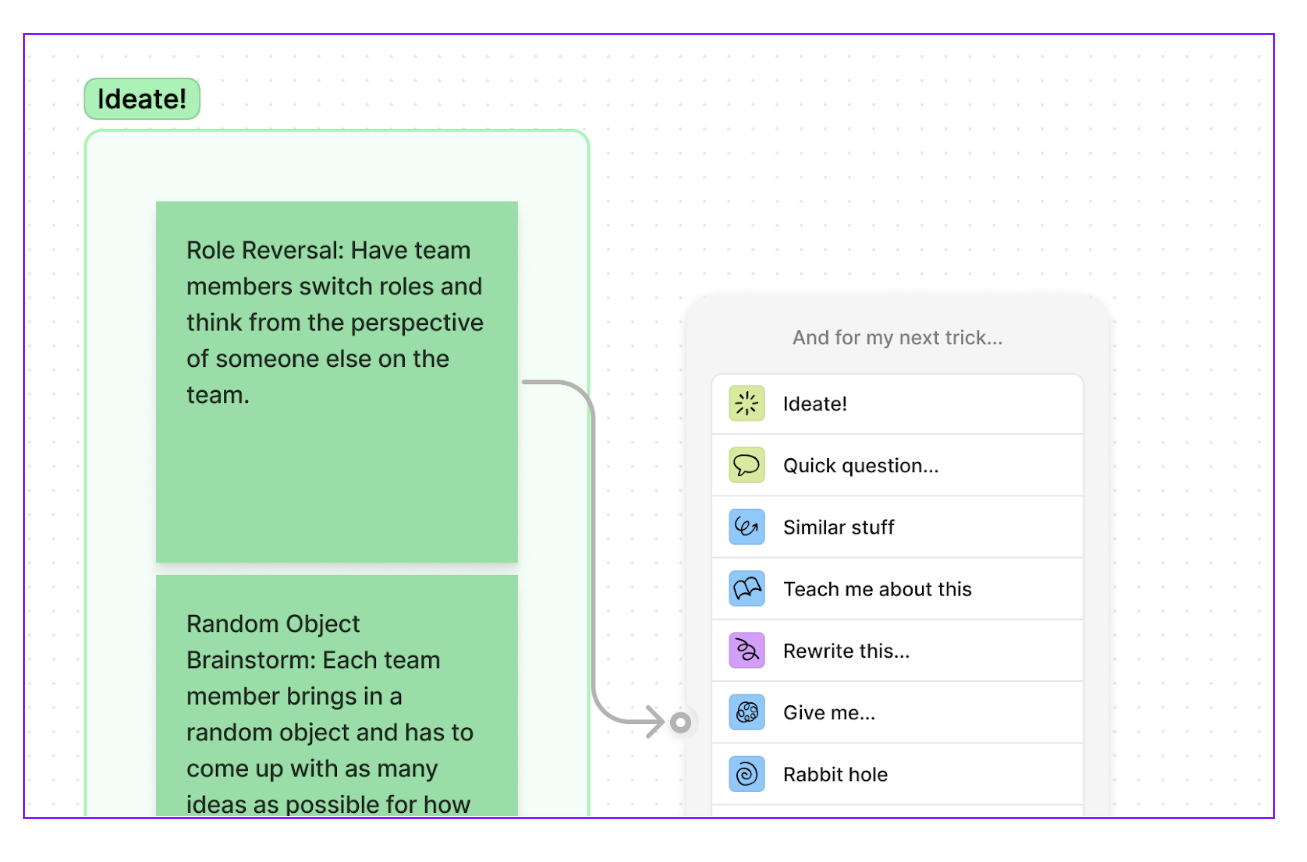
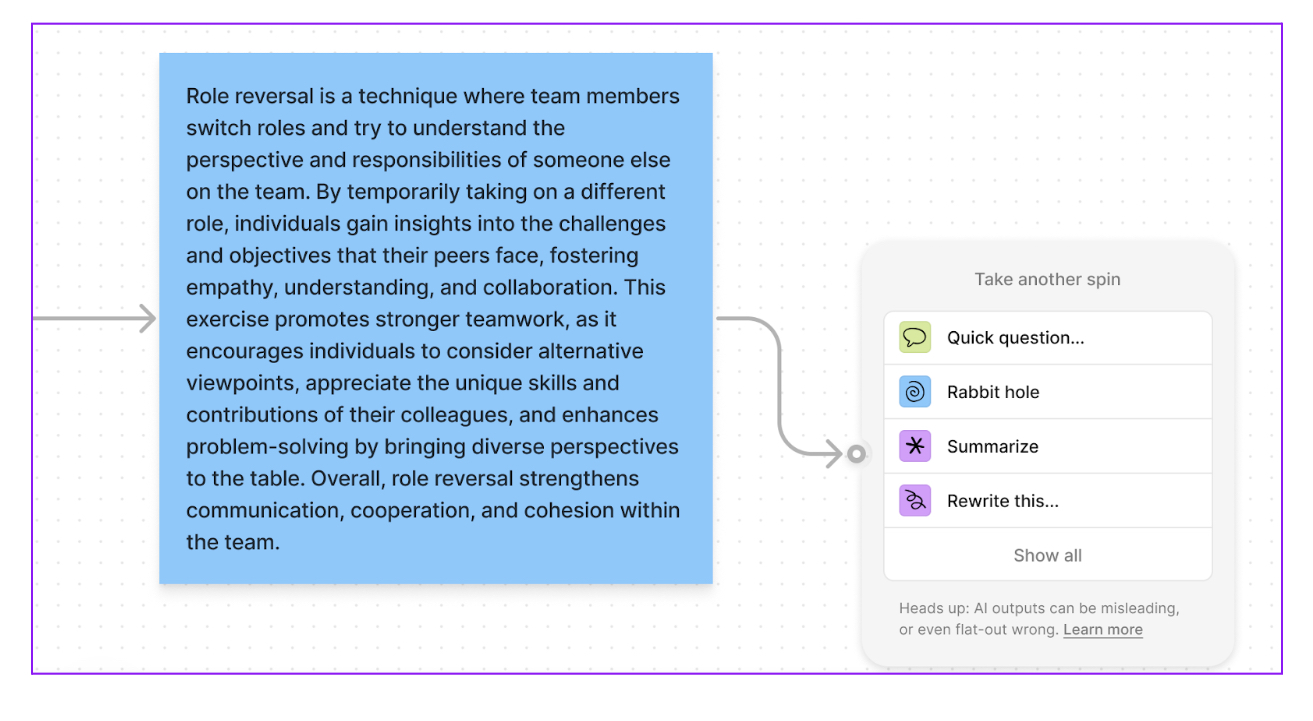
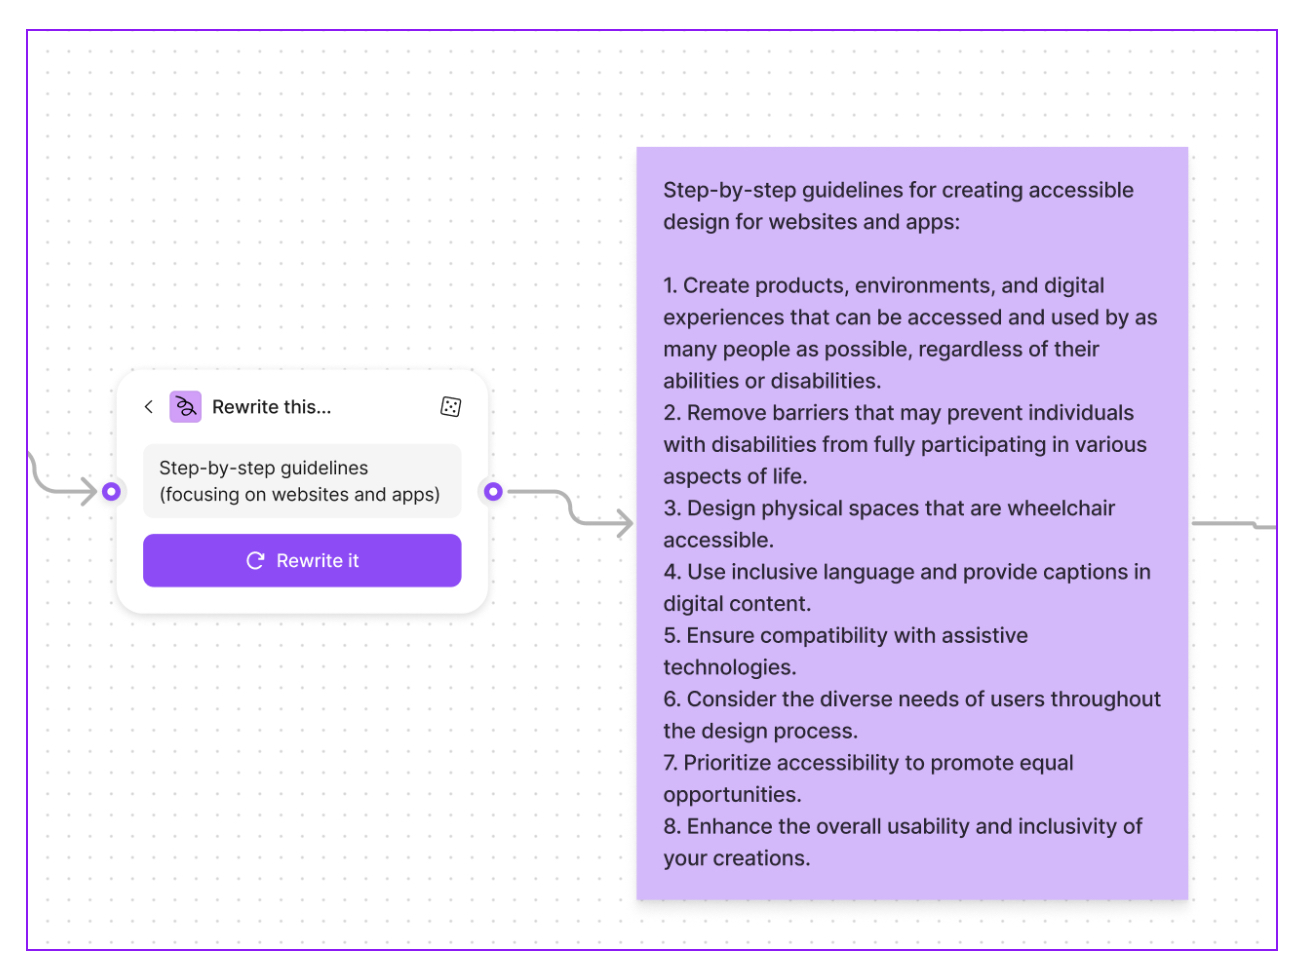
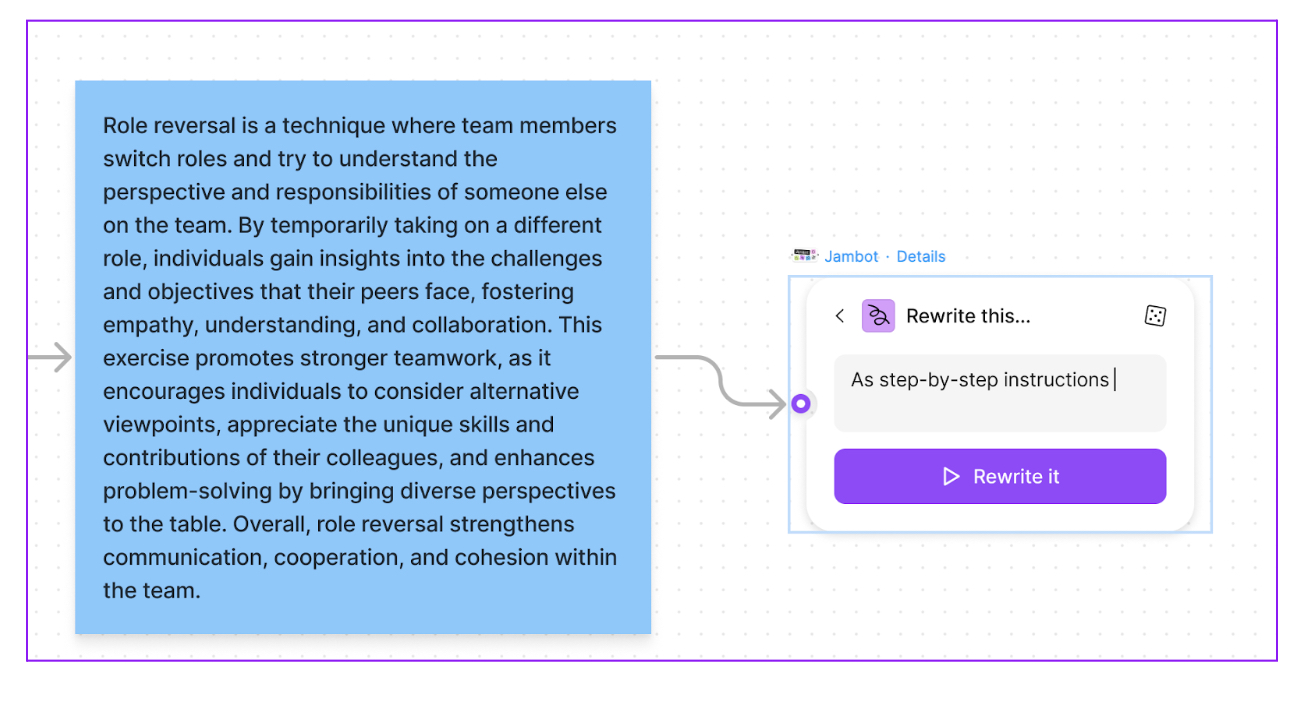
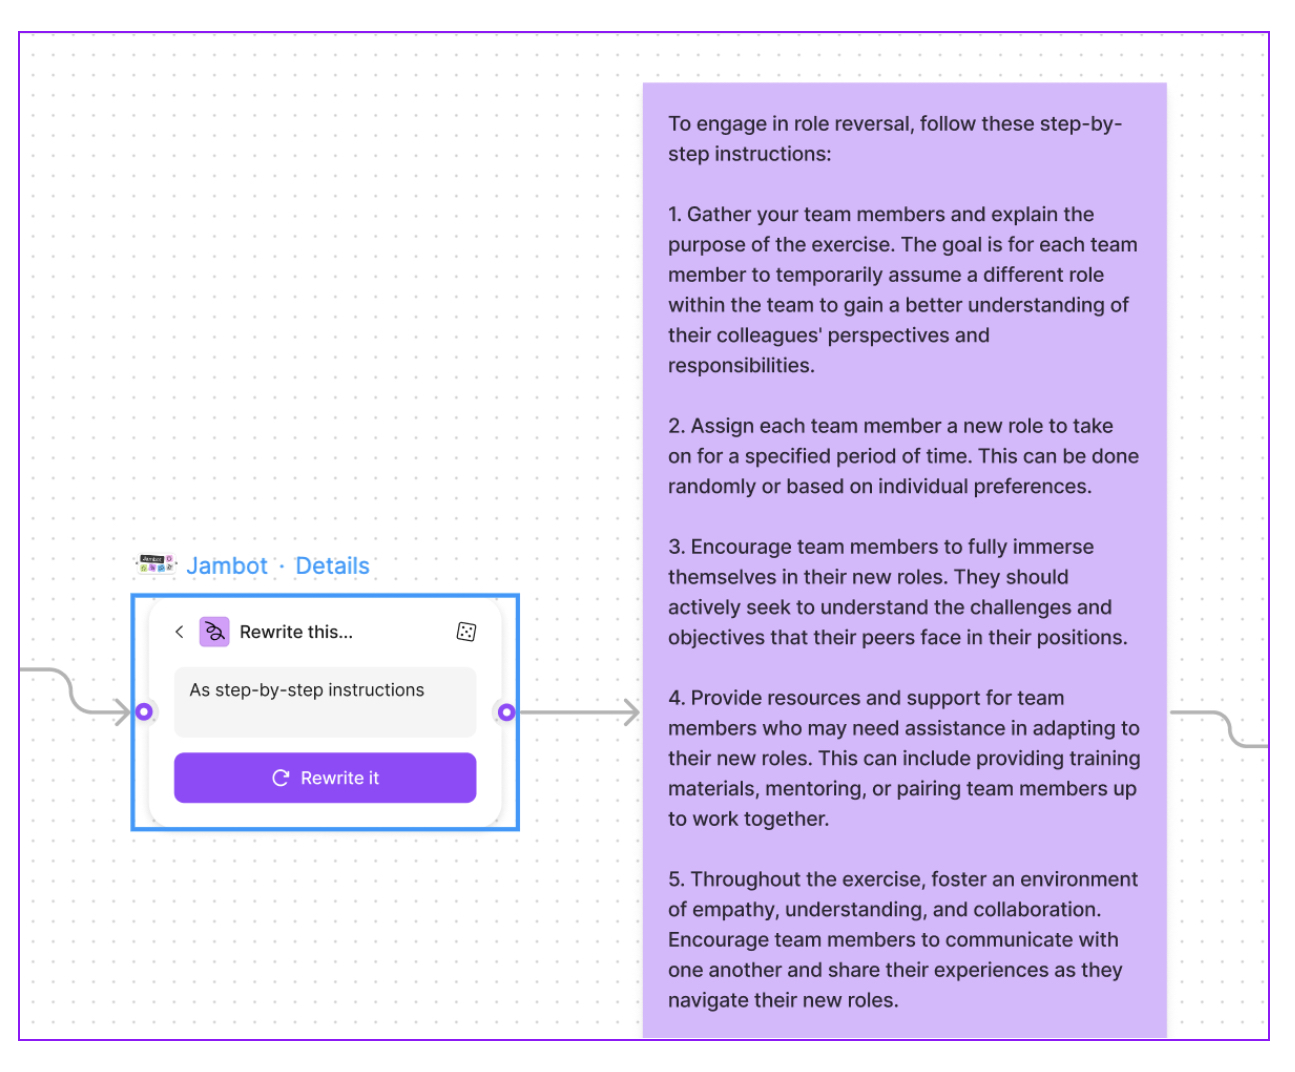
In this case, you’d select ‘Rewrite this’ from the list of available functions, type ‘as step-by-step instructions’ into the text field, then click ‘Rewrite it’ to generate a response:
1. Select the ‘Teach me about this’ function from the Jambot list and write the topic you want to learn about in a new sticky note. Click ‘Teach me’ to execute the prompt:
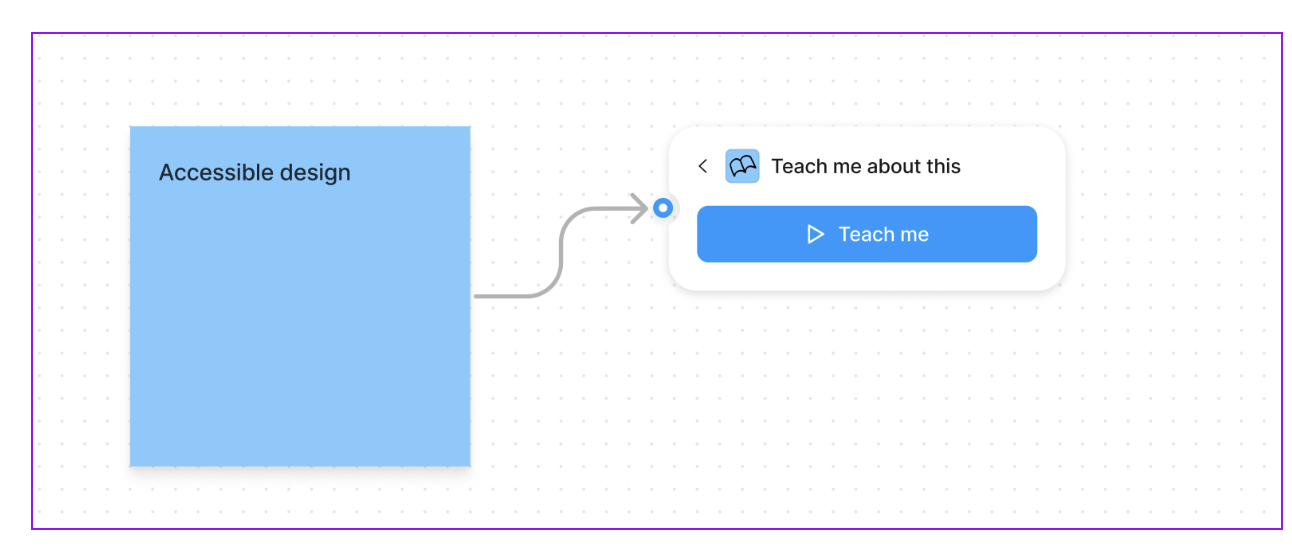
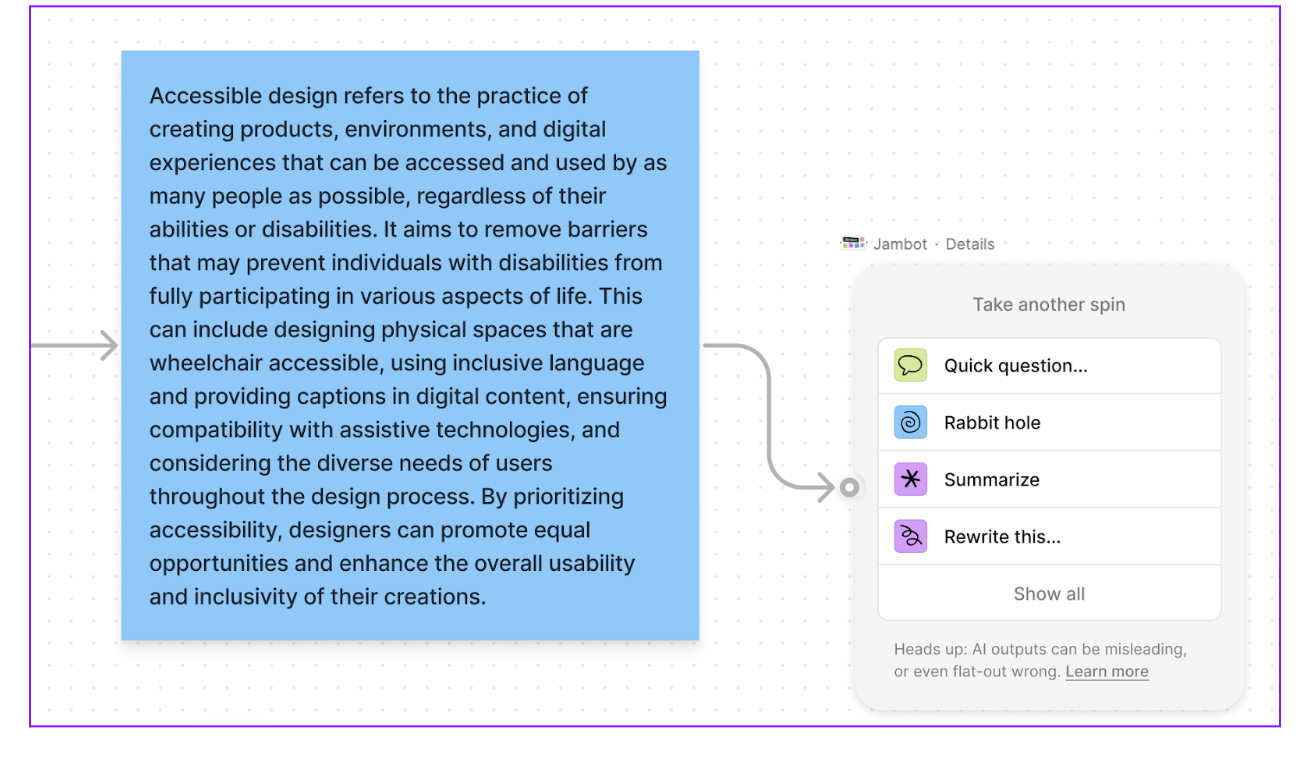
As you can see with this example, the output isn’t entirely relevant. We specified in our prompt that the accessible design guidelines should focus on websites and apps, yet the output mentions designing physical spaces that are wheelchair accessible. An important reminder to be critical and cautious when using AI!
Still, many of the guidelines provide useful points that you could research and explore further.
We’ve covered just some of Jambot’s AI functions and features. You can learn more about how Jambot was created and what it’s capable of over on the Figma blog.
4. Speed up your design process with the QoQo plugin for Figma
Next we move on to the wonderful world of Figma plugins—of which there are now almost 100 offering AI functionality!
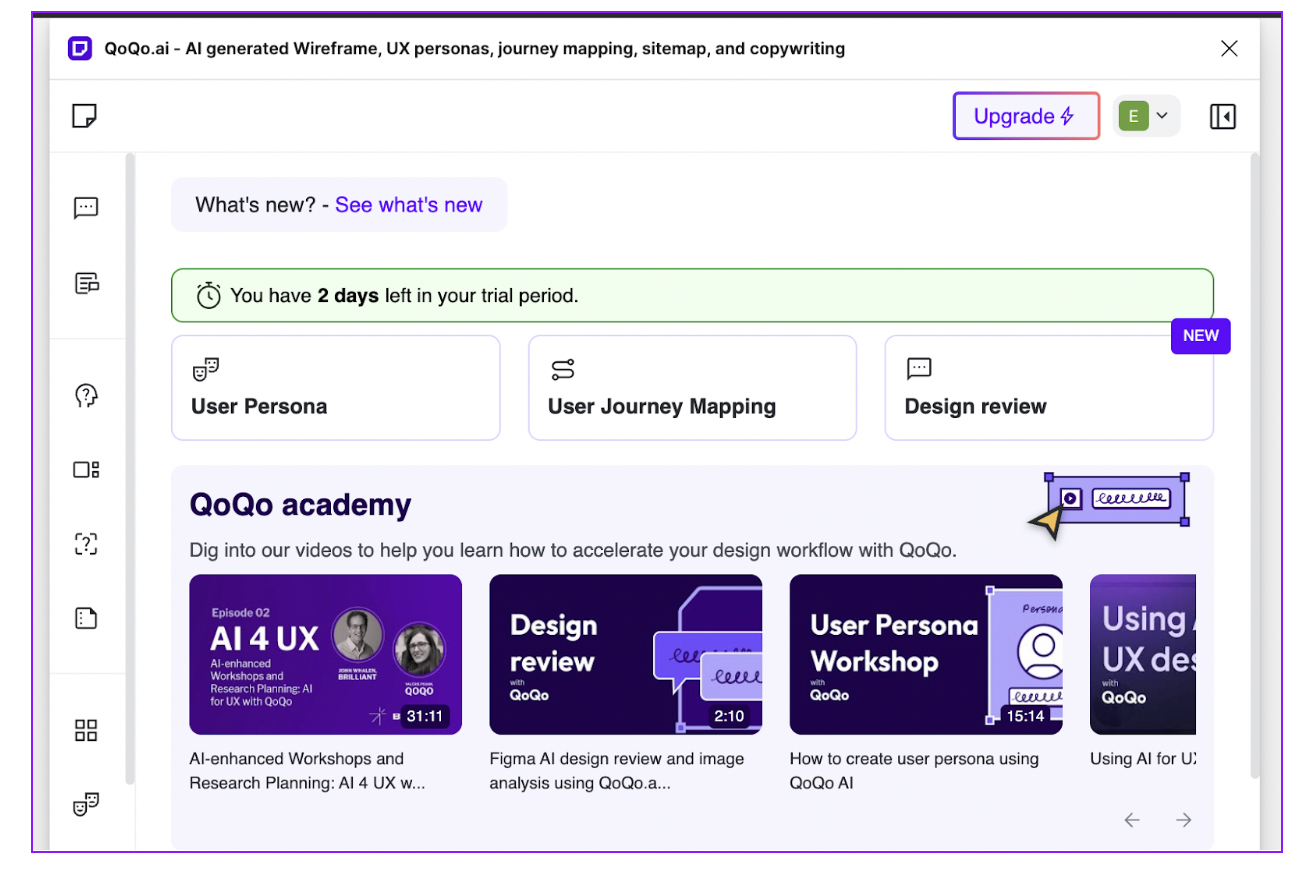
One of the most popular among them is the QoQo plugin. Powered by OpenAI (the same technology behind ChatGPT), QoQo can generate all manner of design deliverables—from wireframes and personas to user journey maps, design briefs, user interview questions, and beyond.
How to set up the QoQo plugin for Figma
QoQo is a third-party plugin; an add-on that enhances the functionality of the standard Figma tool. As such, you’ll be required to create a separate QoQo account in order to run the plugin.
To get set up:
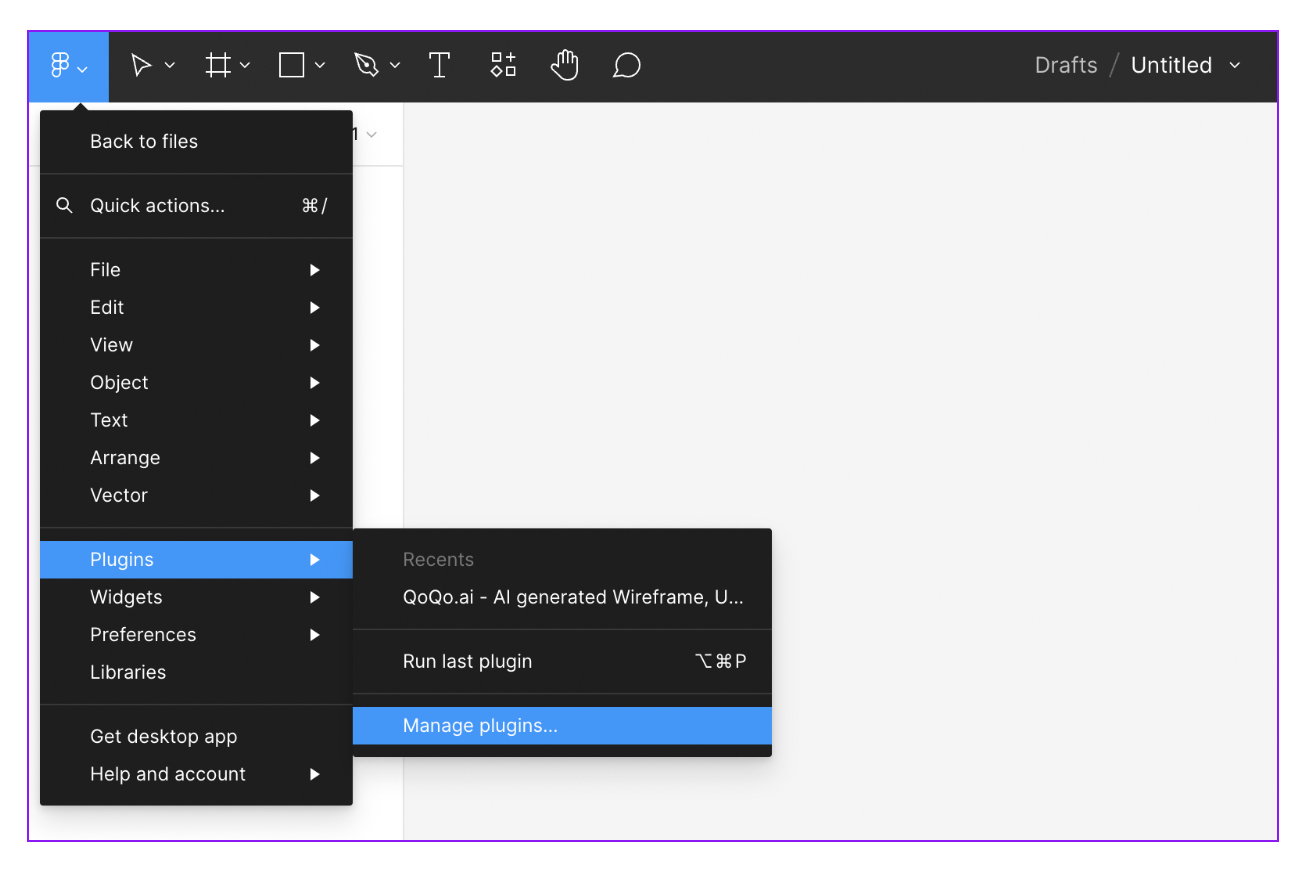
1. Log in to Figma, open a new design file, and navigate to ‘Plugins —> Manage plugins’ from the main menu (the F icon in the top-left corner):
How to use QoQo to generate solutions based on user pain-points:
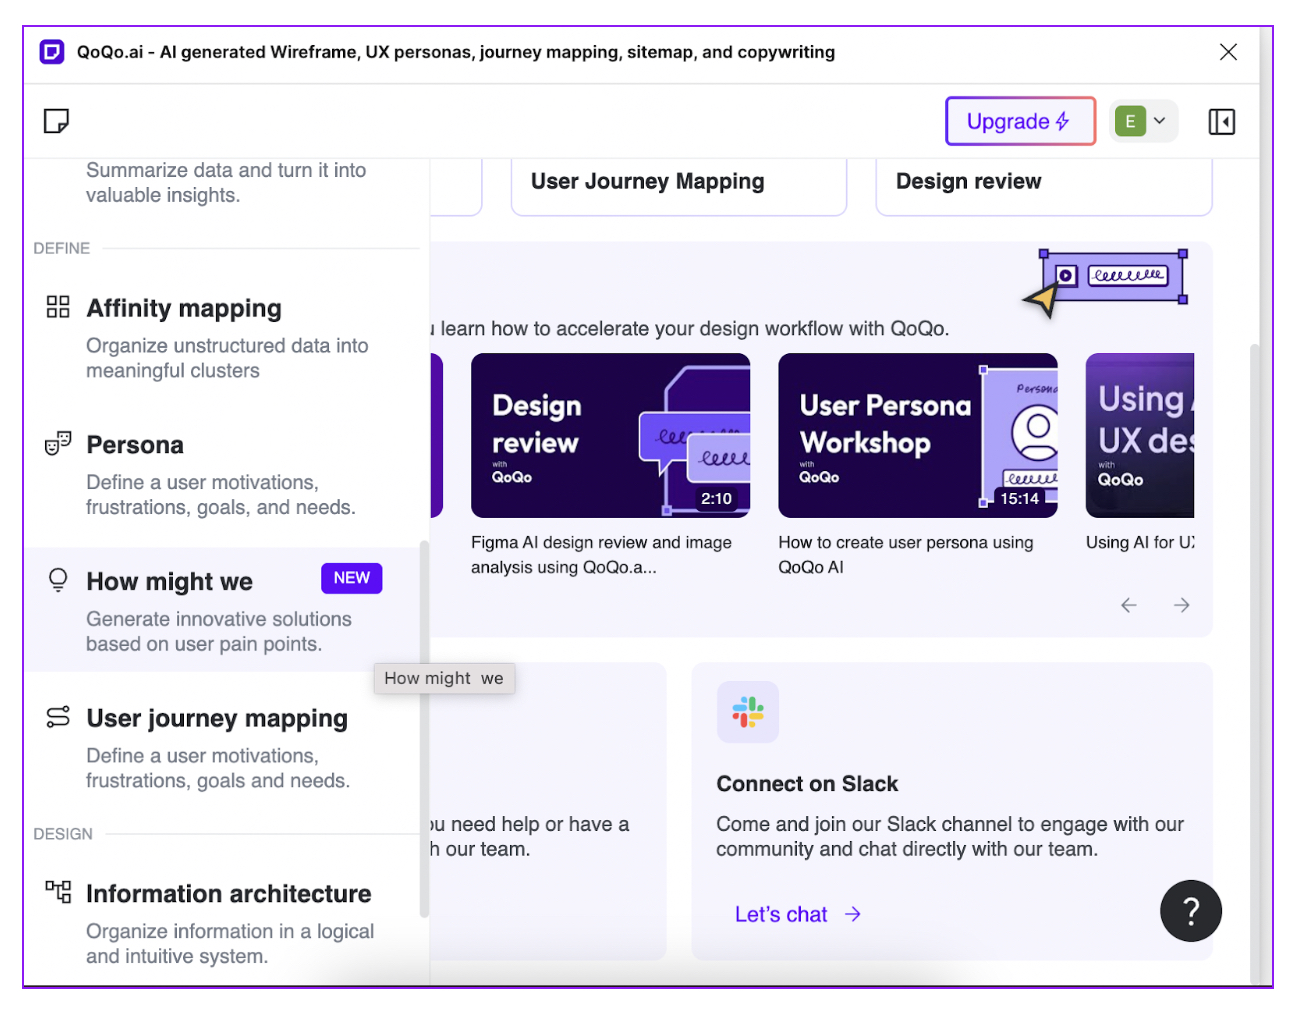
If you’ve already conducted user research and identified user pain-points, you can use the ‘How might we’ function to generate ideas and solutions.
1. With the QoQo plugin running in Figma, you can see all possible functions if you expand the left-hand side bar (by hovering over it with your mouse). Select the ‘How might we’ function:
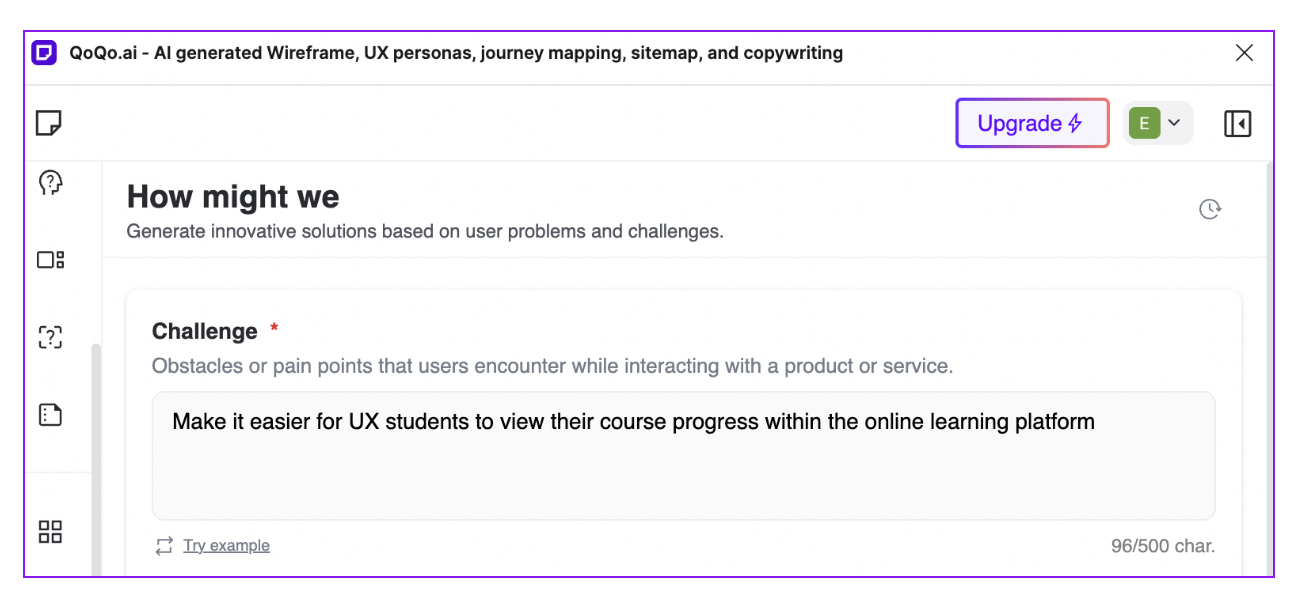
2. Enter your user pain-points into the text field, formulated as a ‘how might we’ question. For example: [How might we] ‘make it easier for UX students to view their course progress within the online learning platform’.
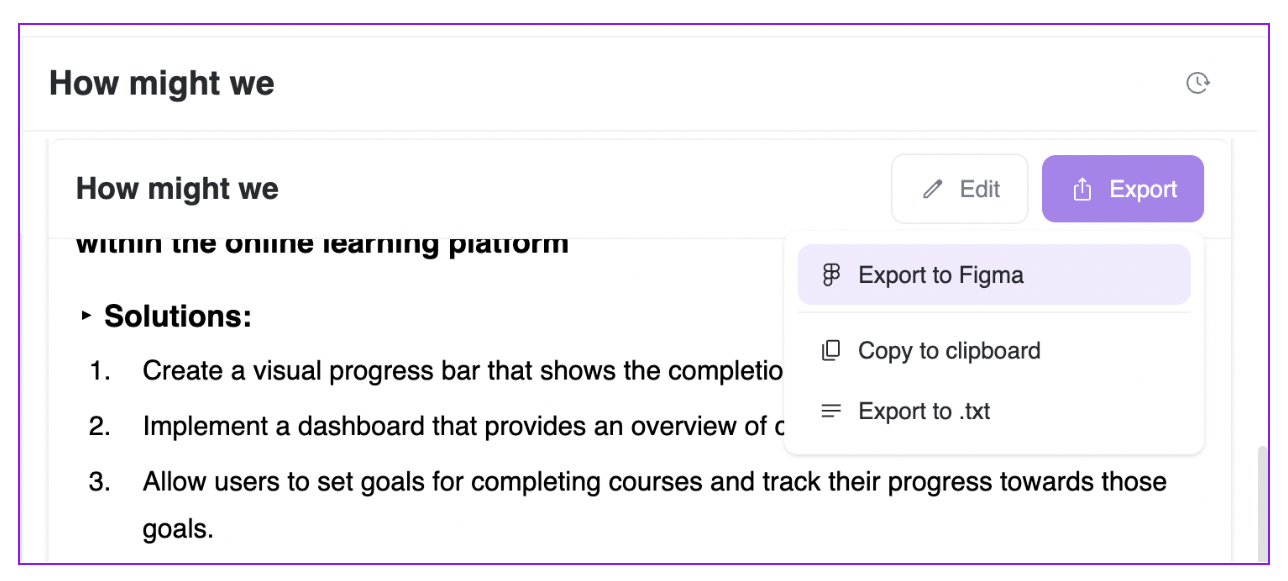
3. Click ‘Generate’ and QoQo will come up with multiple solutions, like so:
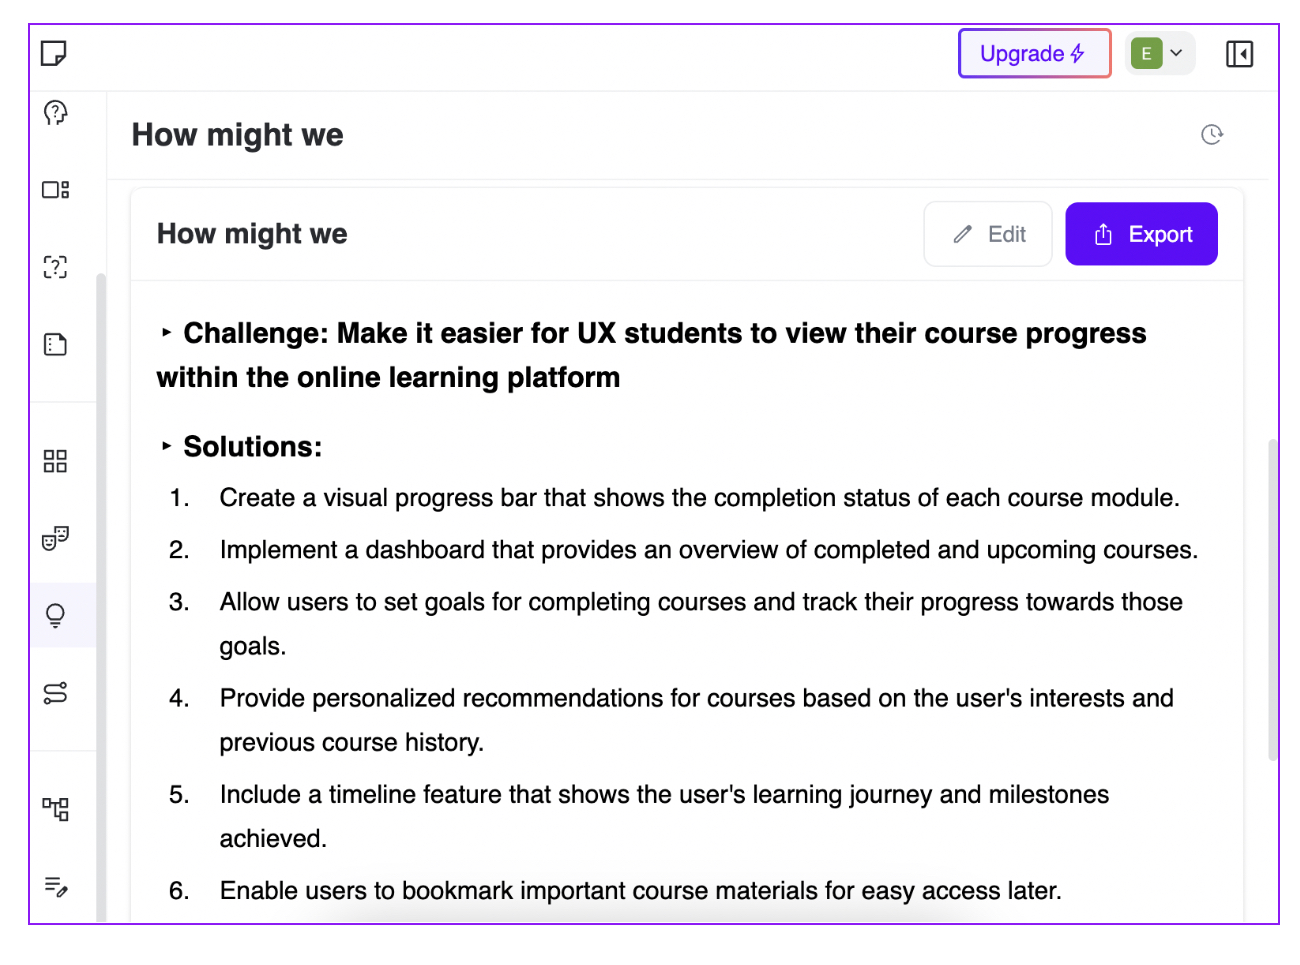
Once you close the QoQo window, you’ll see each solution presented as an individual sticky note in your Figma board:

How to use QoQo AI to generate a design brief:
You can also use QoQo to speedily create design briefs based on your input. Here’s how:
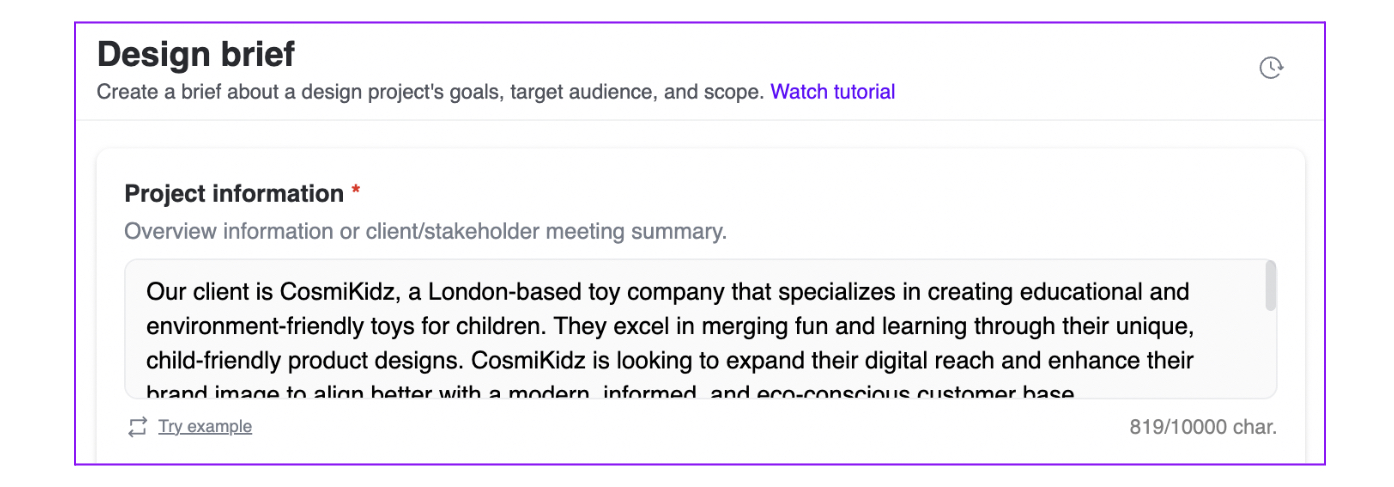
1. Select the ‘Design brief’ function from the left-hand side bar, then start by filling out the ‘Project information’ section. Ideally, you’ll have some notes from the project kick-off meeting to help you with this section:
Tip: Click “Try example” to get an idea of what kind of information to include in this section and how to formulate it.
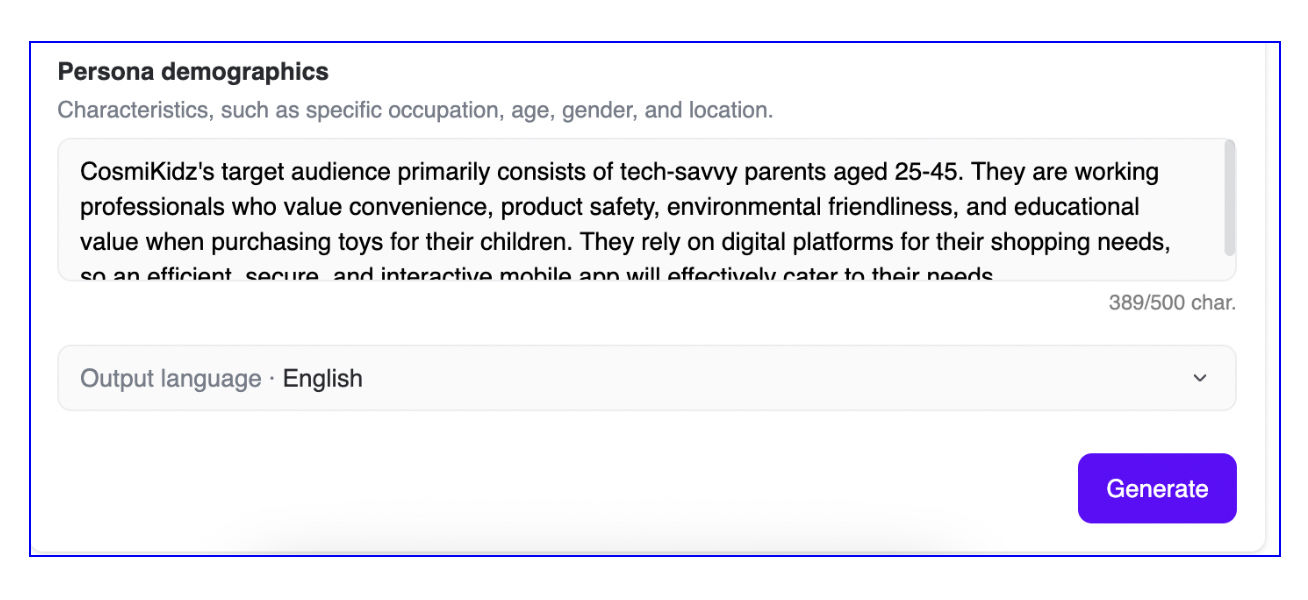
2. Next, fill in the ‘Persona demographics’ section. This should provide key characteristics of your target audience, based on real UX personas you’ve created through user research:
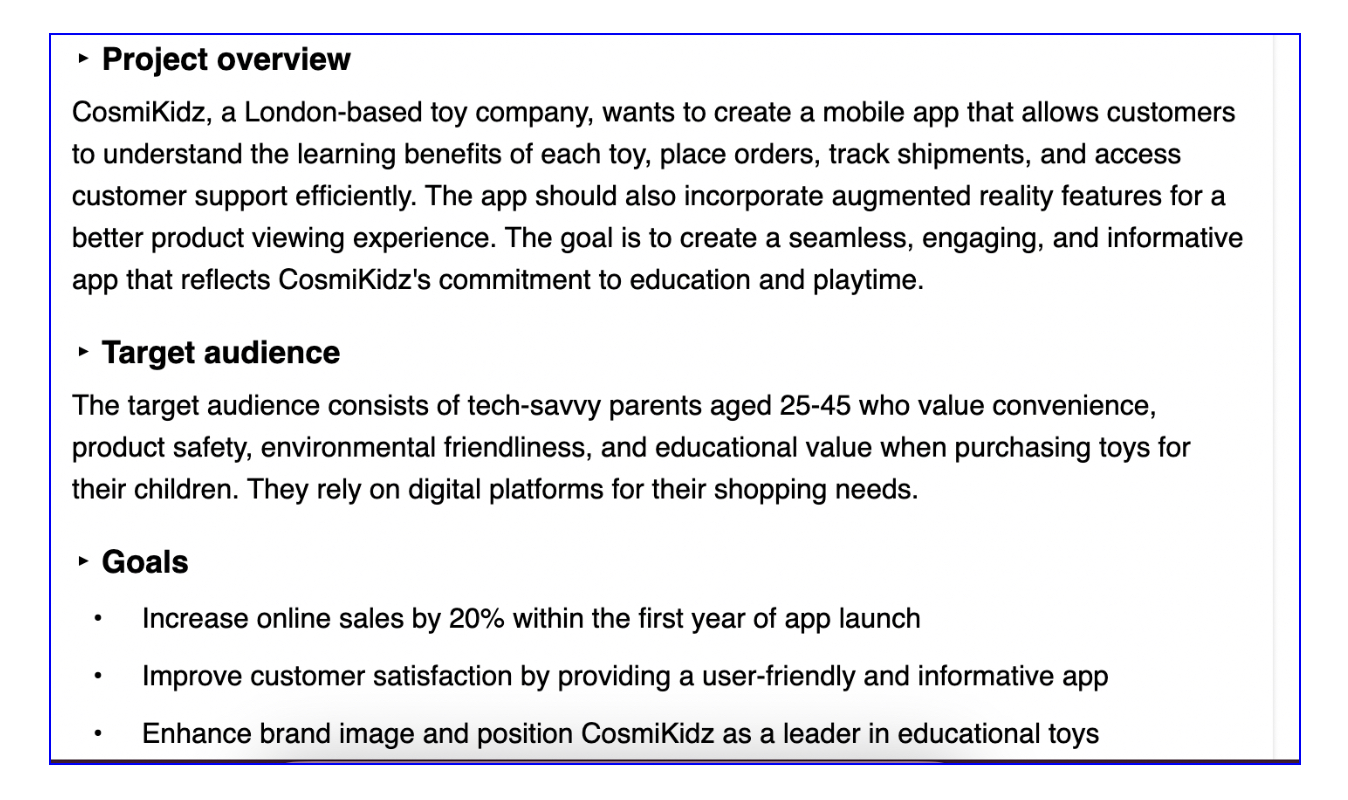
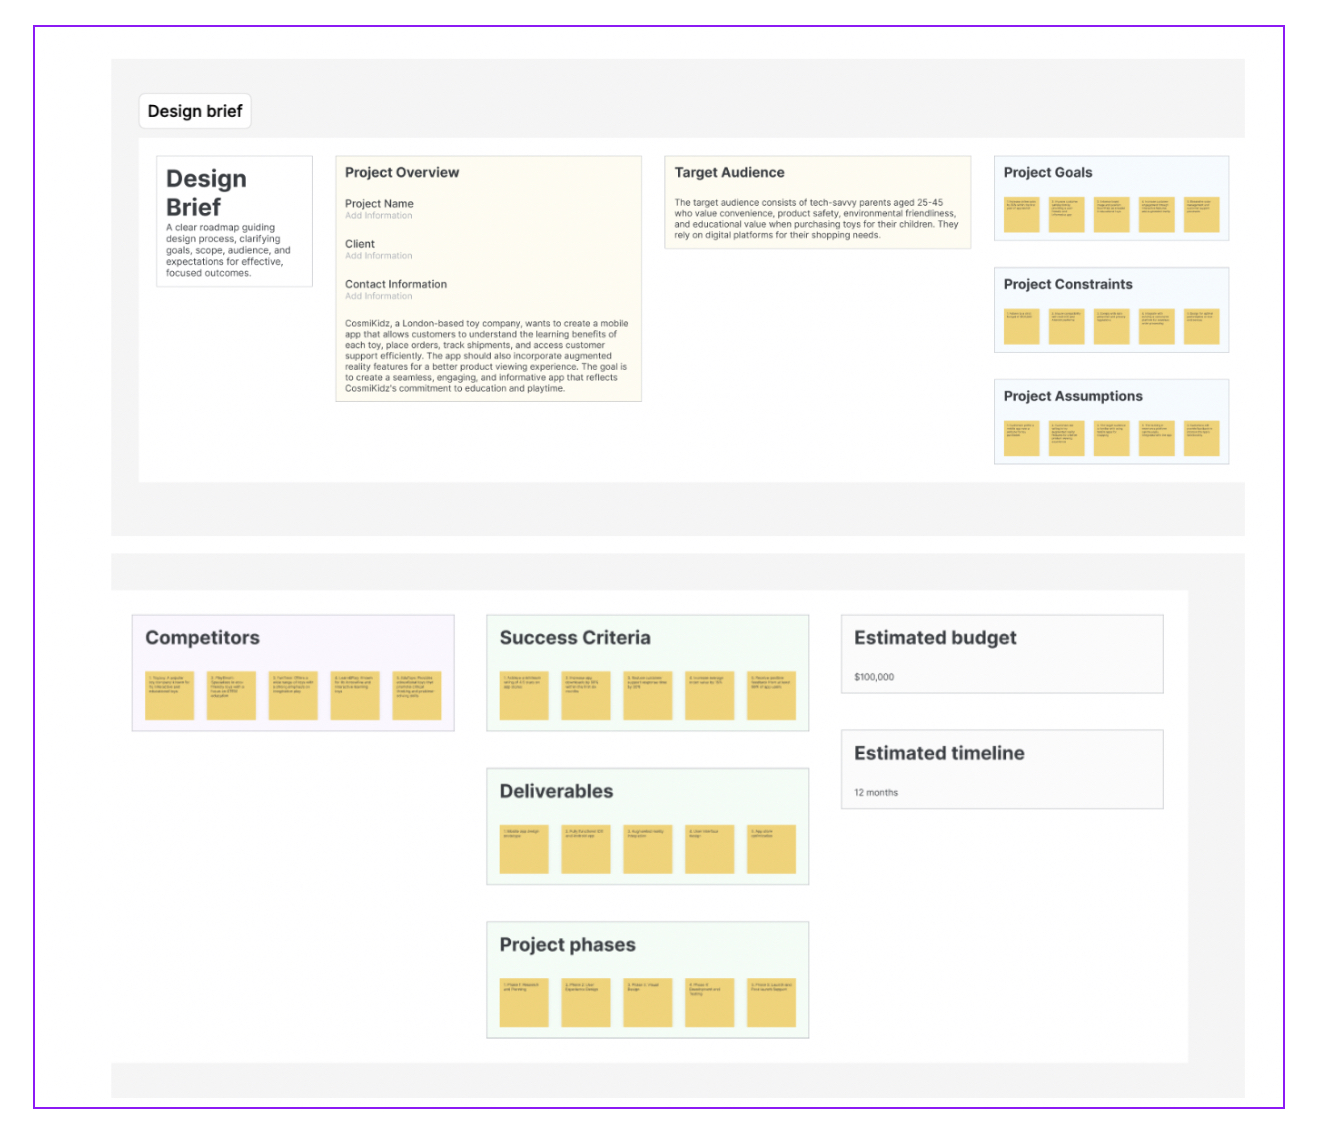
Screenshot of a design brief within Figma
Once you’re happy with it, share the brief with all relevant stakeholders and use it to keep everybody aligned.
We’ve covered just a few handy features available with QoQo AI—there’s a lot more you can do with it! Set up the plugin in your own Figma board and explore how it can help you in the early stages of design.
5. Auto-generate designs with the AI Assistant plugin
Imagine if you could whip up fully-editable UI designs in seconds…Well, with the AI Assistant plugin created by Figma user Ollie Martynov, you can do just that!
This all-powerful plugin offers some great AI shortcuts to save you time and streamline the design process, including:
Let’s explore one of the most useful AI Assistant features for designers: Text-to-Design.
How to auto-generate designs using the Text-to-Design feature:
1. Log into Figma and run the AI Assistant plugin (you can do this via the ‘Manage plugins’ menu available in the main Figma menu in the top left-hand corner).
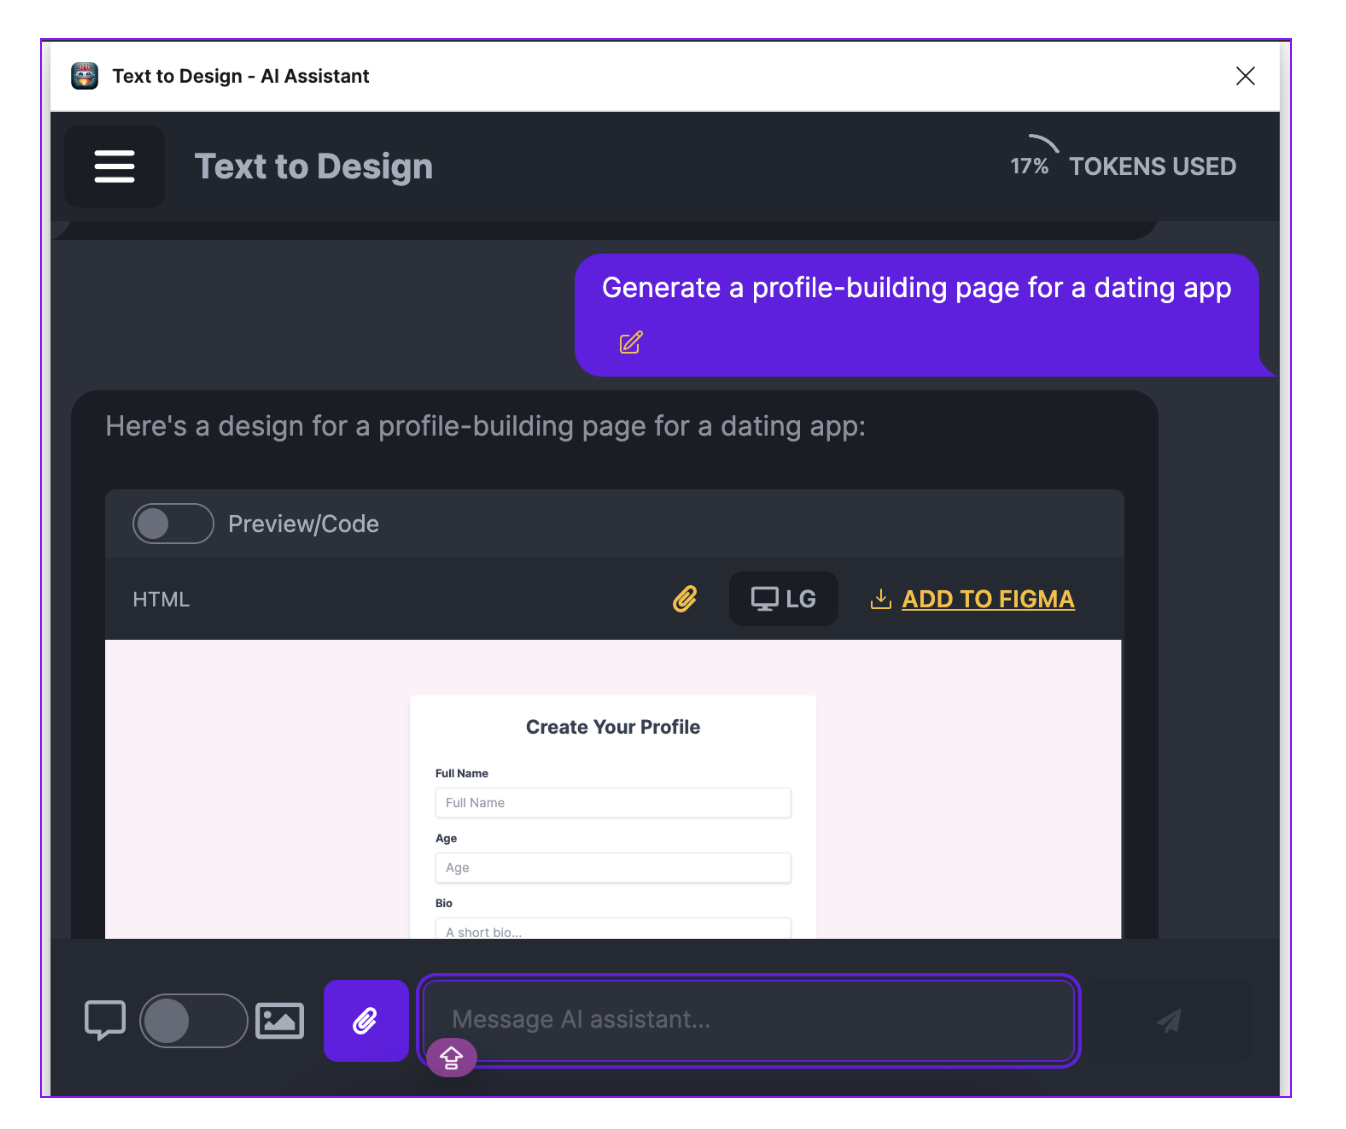
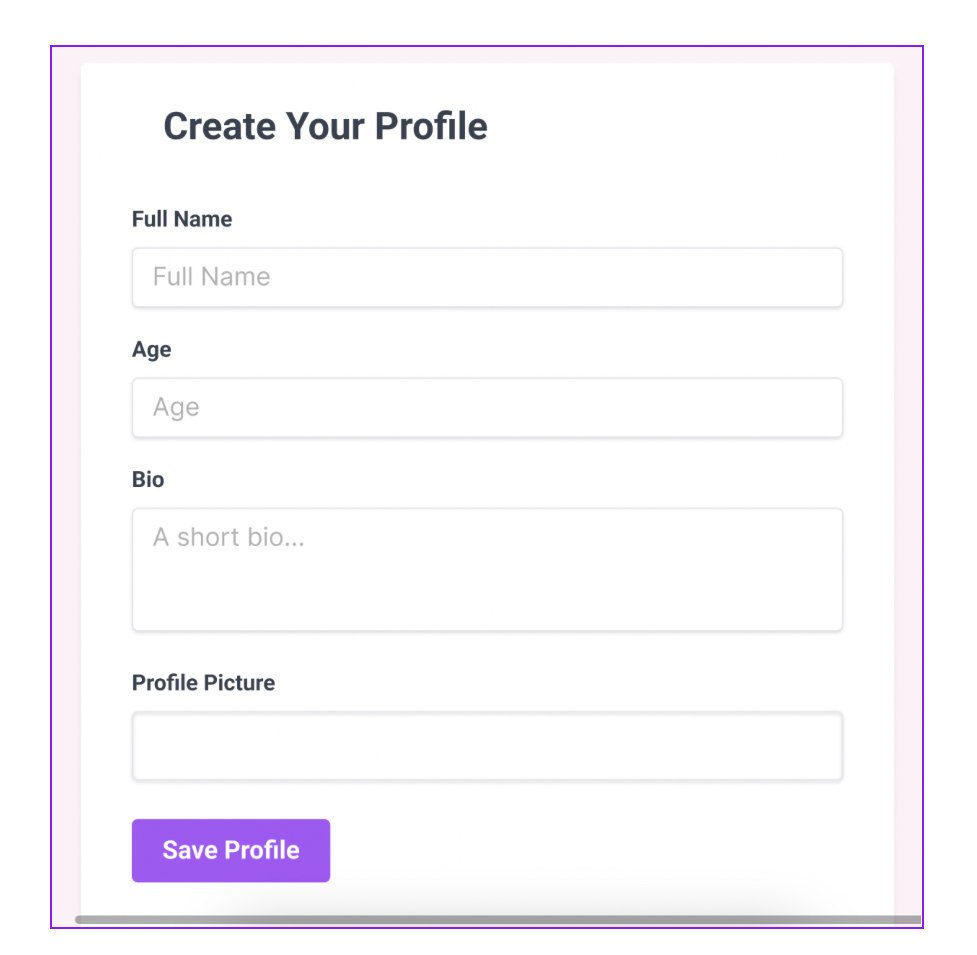
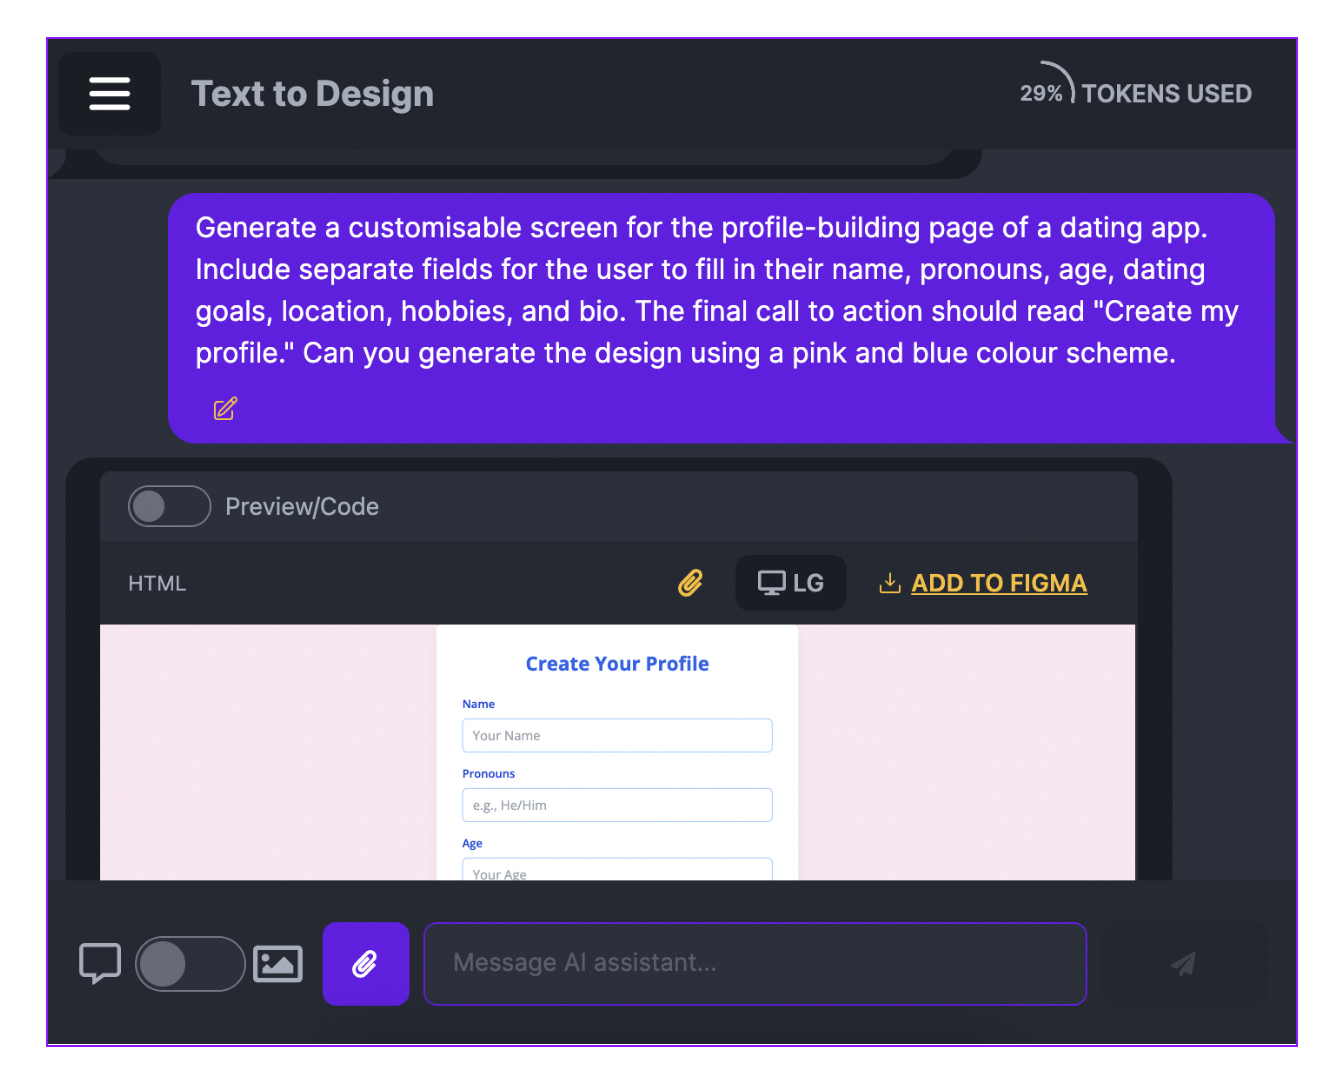
This will open up a chat-style window where you can enter your design prompt. For example: ‘Generate a profile-building page for a dating app’:
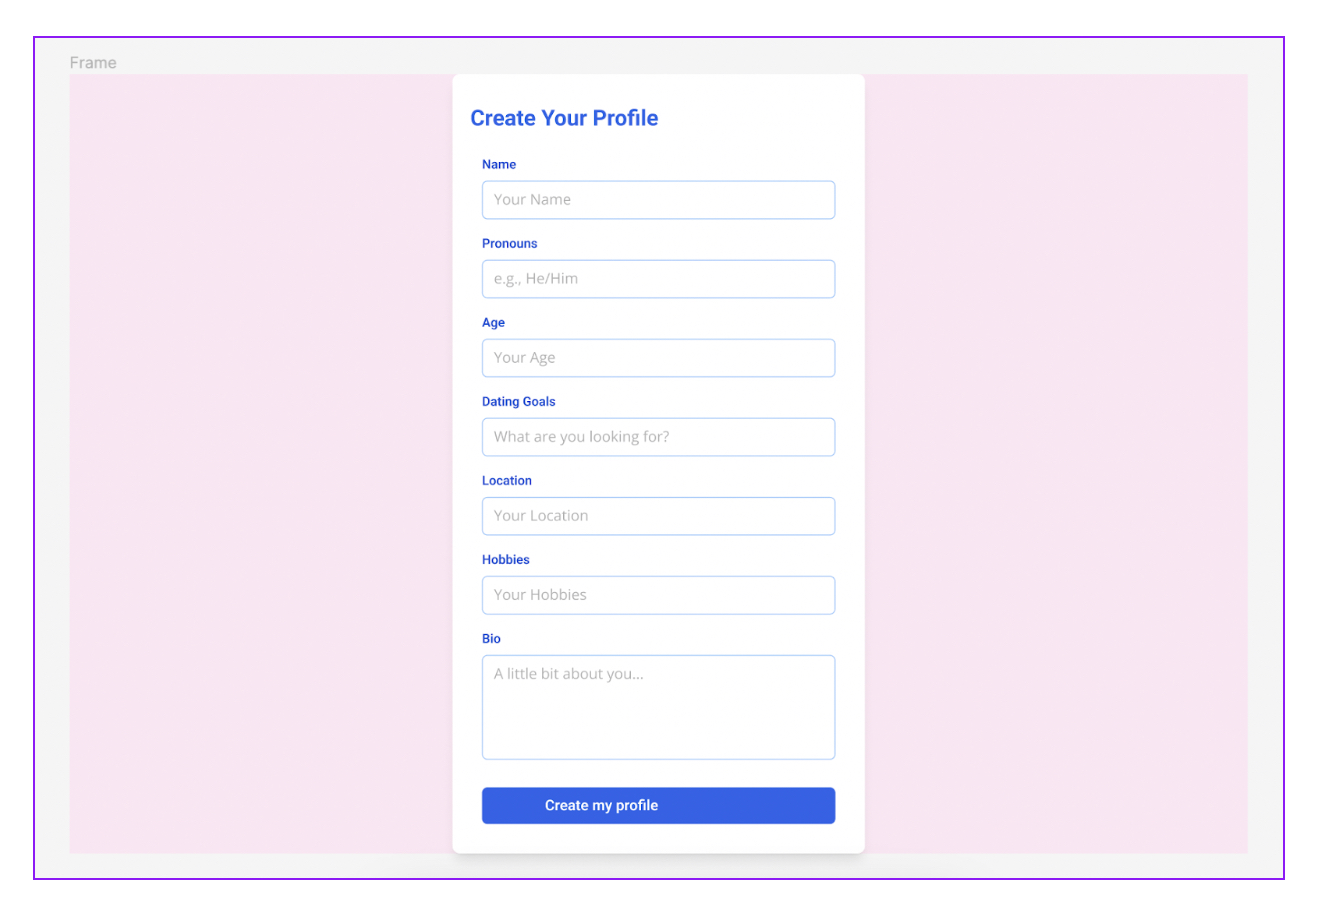
2. You can then click ‘Add to Figma’ to export the design to your Figma board. From there, you can customise the basic design provided by double-clicking on various elements. For example, you can edit the button text and form fields, and adjust the position of each element.
3. If you’re not quite happy with the output, experiment with more specific, prescriptive prompts. For example: ‘Generate a customisable screen for the profile-building page of a dating app. Include separate fields for the user to fill in their name, pronouns, age, dating goals, location, hobbies, and bio. The final call to action should read “Create my profile.” Generate the design using a pink and blue colour scheme.’
Again, you can export the output to Figma and adjust it as needed.
You’ll notice that the designs aren’t perfect—and nor should you expect them to be. AI-generated designs, such as those created with the AI Assistant plugin, serve as a basic foundation on which to build. They can speed up the process of mocking up low-fidelity designs, but they won’t suffice as a final design solution.
As always, use the AI Assistant plugin (and other Figma AI tools) as a handy shortcut; not a complete replacement for your own creativity and design expertise.
Learn more about AI for UX/UI design
We’ve explored just a few AI features and plugins available in Figma. There are many more plugins available via the Figma community, and we eagerly anticipate that Figma will continue to expand their AI featureset. Watch this space!
Of course, Figma is just one of many popular UX/UI design tools offering AI-powered capabilities. If you’d like to learn more about how AI is shaping the UX industry and affecting how UX designers work, check out these articles:
If you’re keen to embrace AI in your UX design workflow, here are more tools and resources to get you started:

