A customer journey map is a visual representation of how a user interacts with your product. Learn how to create a customer journey map in this practical step-by-step guide.
Successful UX design is rooted in empathy. The best designers are able to step into their users’ shoes and imagine what they think, feel, and experience as they interact with a product or service.
One of the most effective ways to foster user empathy and consider different perspectives is to create customer journey maps—otherwise known as customer journey maps.
If you’re new to journey mapping, look no further than this guide. We’ll explain:
- What is a customer journey map?
- Why create customer journey maps?
- When to create customer journey maps
- What are the elements of a customer journey map?
- How to create a customer journey map (step-by-step)
If you want to skip straight to the how-to guide, just use the clickable menu to jump ahead. Otherwise, let’s begin with a definition.
What is a customer journey map?
A customer journey map (otherwise known as a user journey map) is a visual representation of how a user or customer interacts with your product. It maps out the steps they go through to complete a specific task or to achieve a particular goal—for example, purchasing a product from an e-commerce website or creating a profile on a dating app.
Where does their journey begin? What’s their first point of interaction with the product? What actions and steps do they take to reach their end goal? How do they feel at each stage?
You can answer all of those questions with a user journey map.
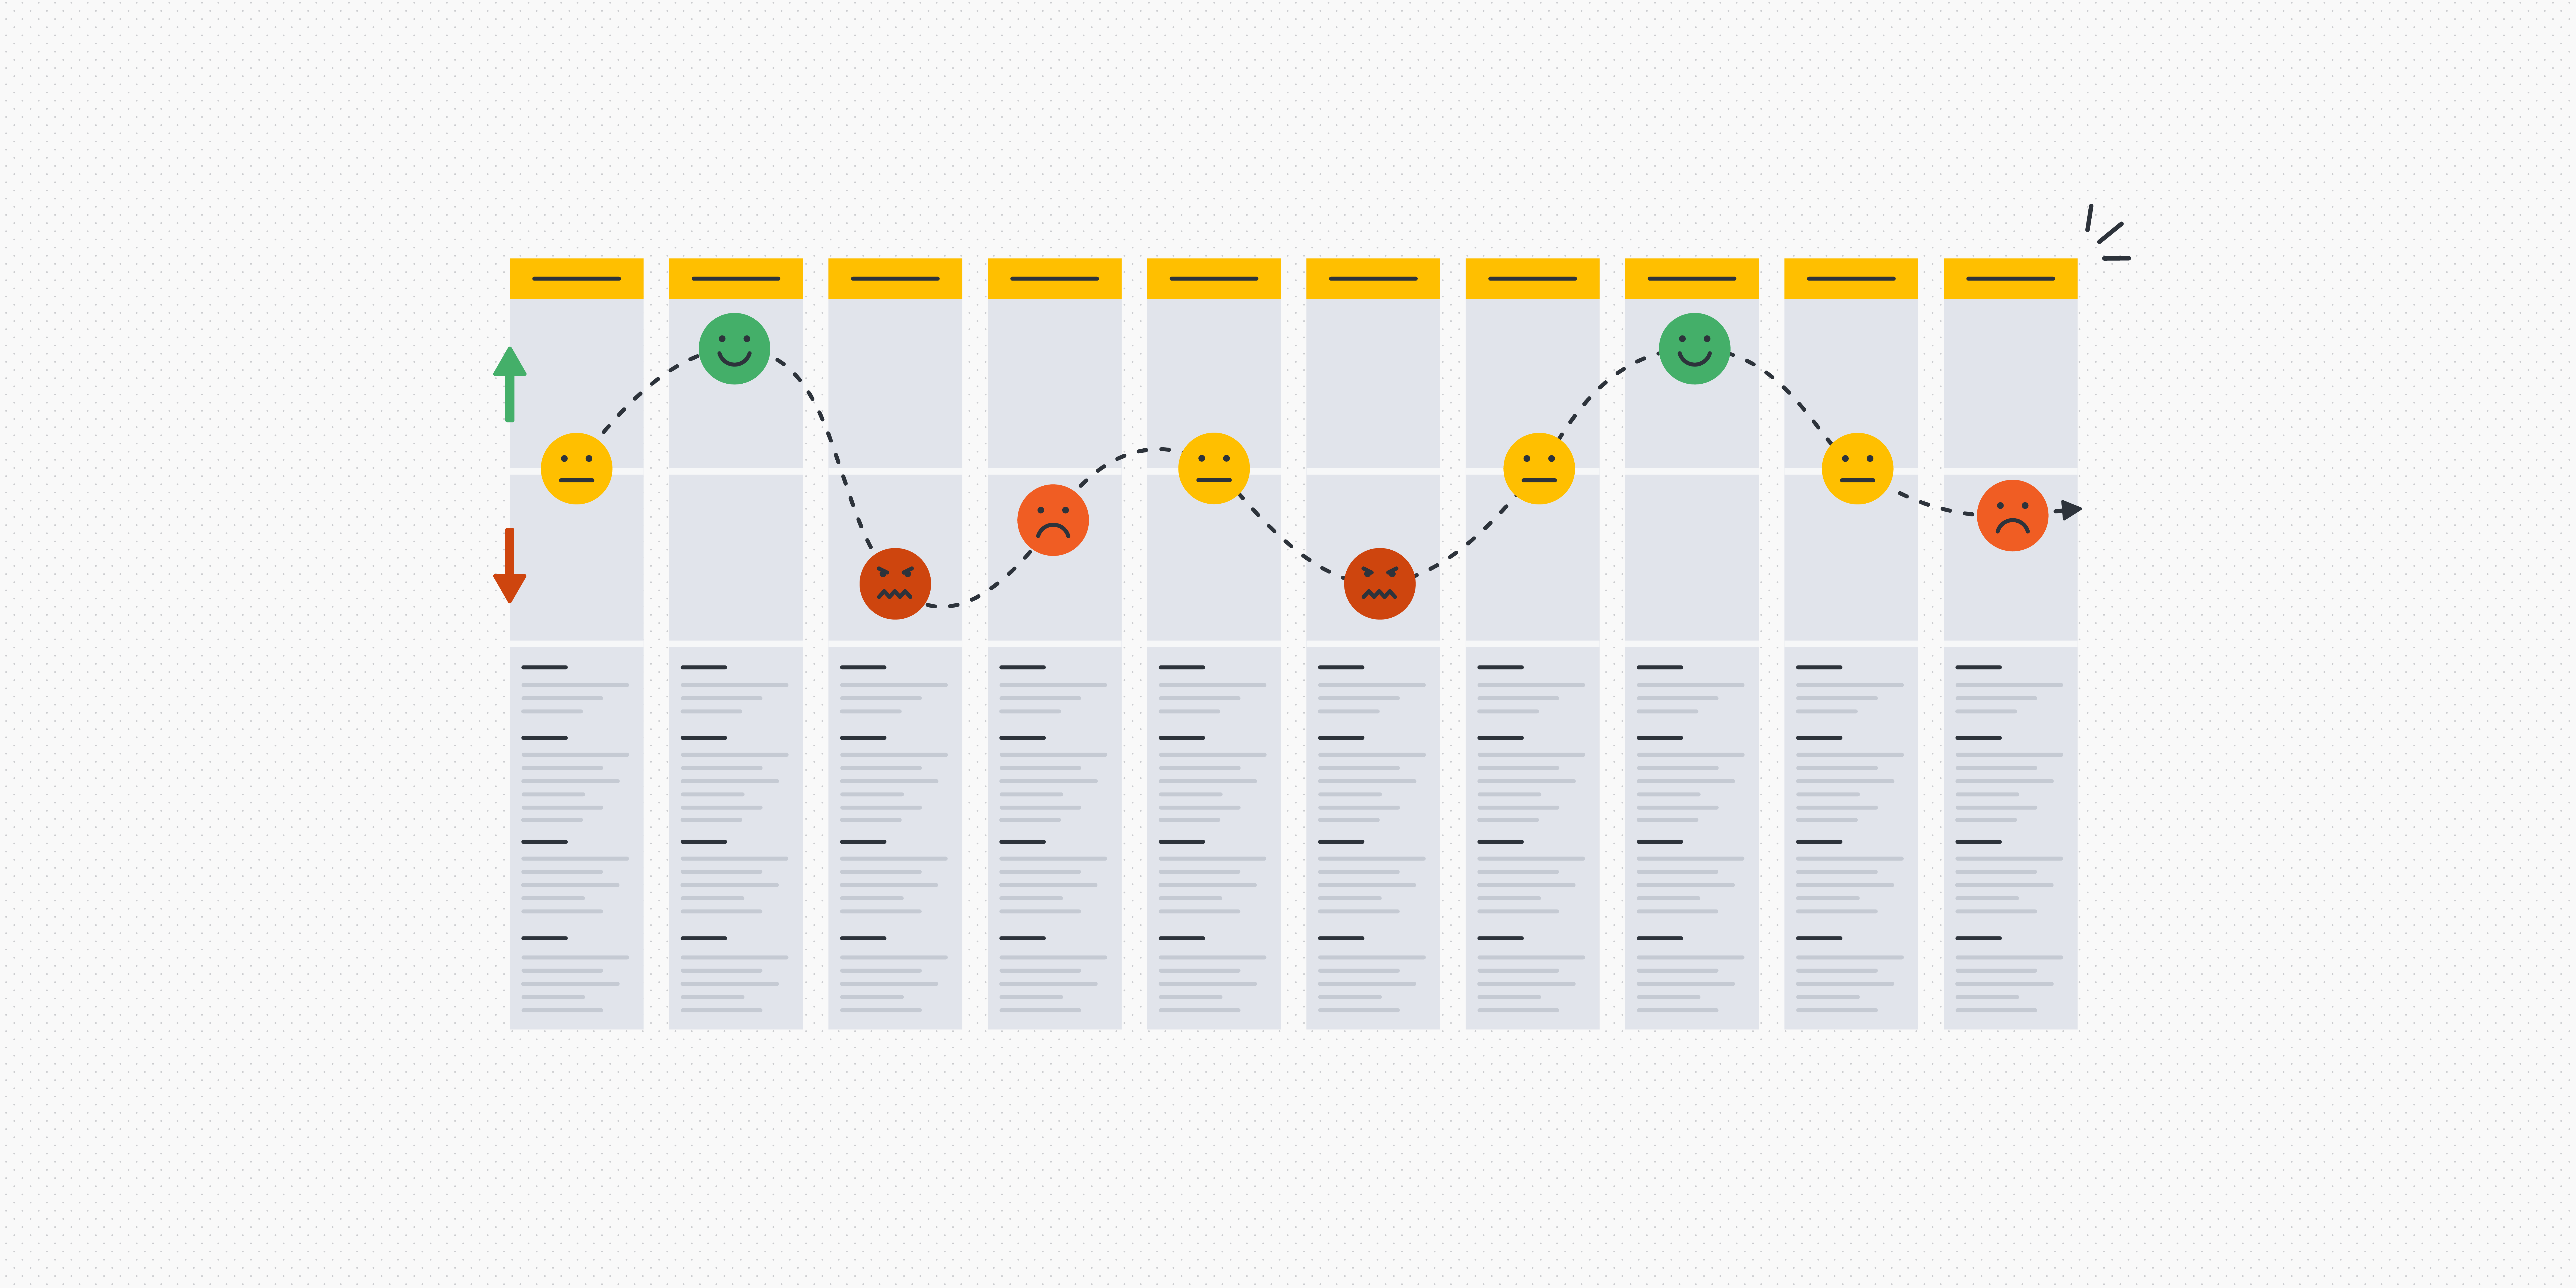
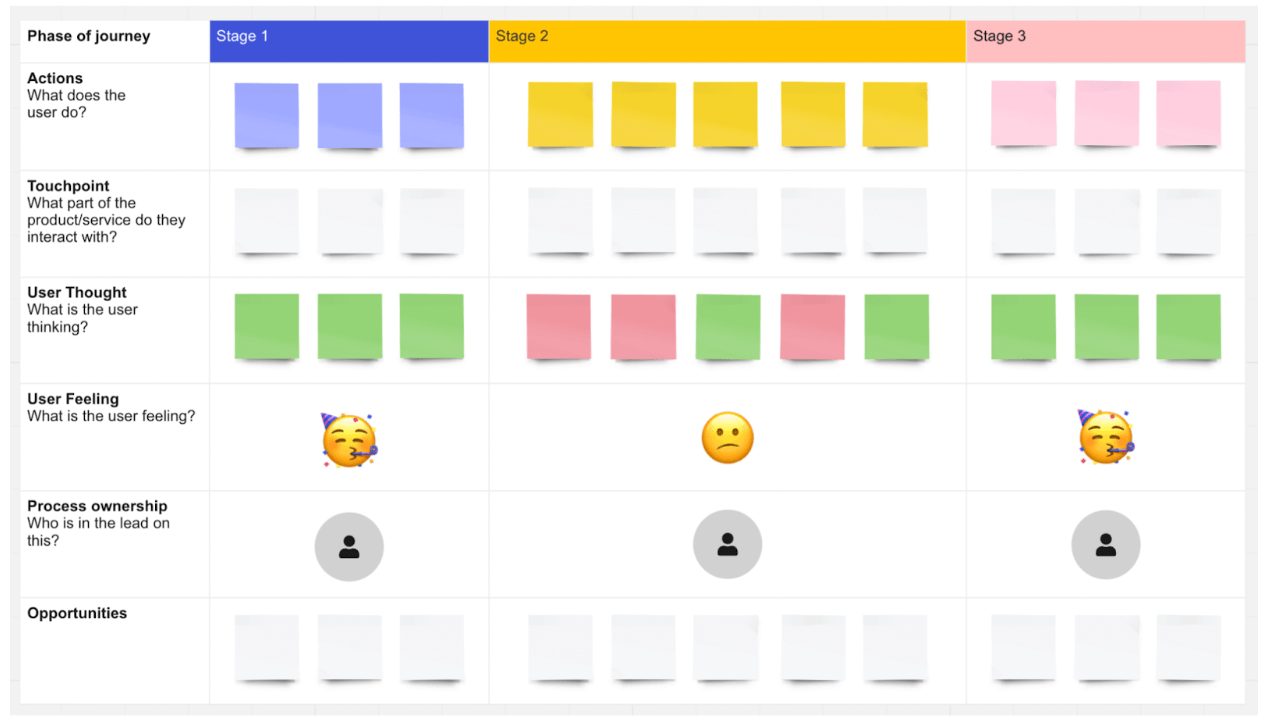
A user journey map template from Miro.
Why create customer journey maps?
Creating customer journey maps helps to:
- Centre the end user and foster empathy. Creating a user/customer journey map requires you to step into the end user’s shoes and experience the product from their perspective. This reminds you to consider the user at all times and fosters empathy.
- Expose pain-points in the user experience. By viewing the product from the user’s perspective, you quickly become aware of pain-points or stumbling blocks within the user experience. Based on this insight, you can improve the product accordingly.
- Uncover design opportunities. User journey maps don’t just highlight pain-points; they can also inspire new ideas and opportunities. As you walk in your end user’s shoes, you might think “Ah! An [X] feature would be great here!”
- Get all key stakeholders aligned. User journey maps are both visual and concise, making them an effective communication tool. Anybody can look at a user journey map and instantly understand how the user interacts with the product. This helps to create a shared understanding of the user experience, building alignment among multiple stakeholders.
Ultimately, user journey maps are a great way to focus on the end user and understand how they experience your product. This helps you to create better user experiences that meet your users’ needs.
When to create customer journey maps
User journey maps can be useful at different stages of the product design process.
Perhaps you’ve got a fully-fledged product that you want to review and optimise, or completely redesign. You can create journey maps to visualise how your users currently interact with the product, helping you to identify pain-points and inform the next iteration of the product.
You can also create user journey maps at the ideation stage. Before developing new ideas, you might want to visualise them in action, mapping out potential user journeys to test their validity.
And, once you’ve created user journey maps, you can use them to guide you in the creation of wireframes and prototypes. Based on the steps mapped out in the user journey, you can see what touchpoints need to be included in the product and where.
What are the elements of a customer journey map?
No two user journey maps are the same—you can adapt the structure and content of your maps to suit your needs. But, as a rule, user journey maps should include the following:
- A user persona. Each user journey map represents the perspective of just one user persona. Ideally, you’ll base your journey maps on UX personas that have been created using real user research data.
- A specific scenario. This describes the goal or task the journey map is conveying—in other words, the scenario in which the user finds themselves. For example, finding a language exchange partner on an app or returning a pair of shoes to an e-commerce company.
- User expectations. The goal of a user journey map is to see things from your end user’s perspective, so it’s useful to define what their expectations are as they complete the task you’re depicting.
- High-level stages or phases. You’ll divide the user journey into all the broad, high-level stages a user goes through. Imagine you’re creating a user journey map for the task of booking a hotel via your website. The stages in the user’s journey might be: Discover (the user discovers your website), Research (the user browses different hotel options), Compare (the user weighs up different options), Purchase (the user books a hotel).
- Touchpoints. Within each high-level phase, you’ll note down all the touchpoints the user comes across and interacts with. For example: the website homepage, a customer service agent, the checkout page.
- Actions. For each stage, you’ll also map out the individual actions the user takes. This includes things like applying filters, filling out user details, and submitting payment information.
- Thoughts. What is the user thinking at each stage? What questions do they have? For example: “I wonder if I can get a student discount” or “Why can’t I filter by location?”
- Emotions. How does the user feel at each stage? What emotions do they go through? This includes things like frustration, confusion, uncertainty, excitement, and joy.
- Pain-points. A brief note on any hurdles and points of friction the user encounters at each stage.
- Opportunities. Based on everything you’ve captured in your user journey map so far, what opportunities for improvement have you uncovered? How can you act upon your insights and who is responsible for leading those changes? The “opportunities” section turns your user journey map into something actionable.
How to create a customer journey map (step-by-step)
Here’s how to create a user journey map in 6 steps:
- Choose a user journey map template (or create your own)
- Define your persona and scenario
- Outline key stages, touchpoints, and actions
- Fill in the user’s thoughts, emotions, and pain-points
- Identify opportunities
- Define action points and next steps
Let’s take a closer look.
1. Choose a user journey map template (or create your own)
The easiest way to create a user journey map is to fill in a ready-made template. Tools like Miro, Lucidchart, and Canva all offer user/customer journey map templates that you can fill in directly or customise to make your own.
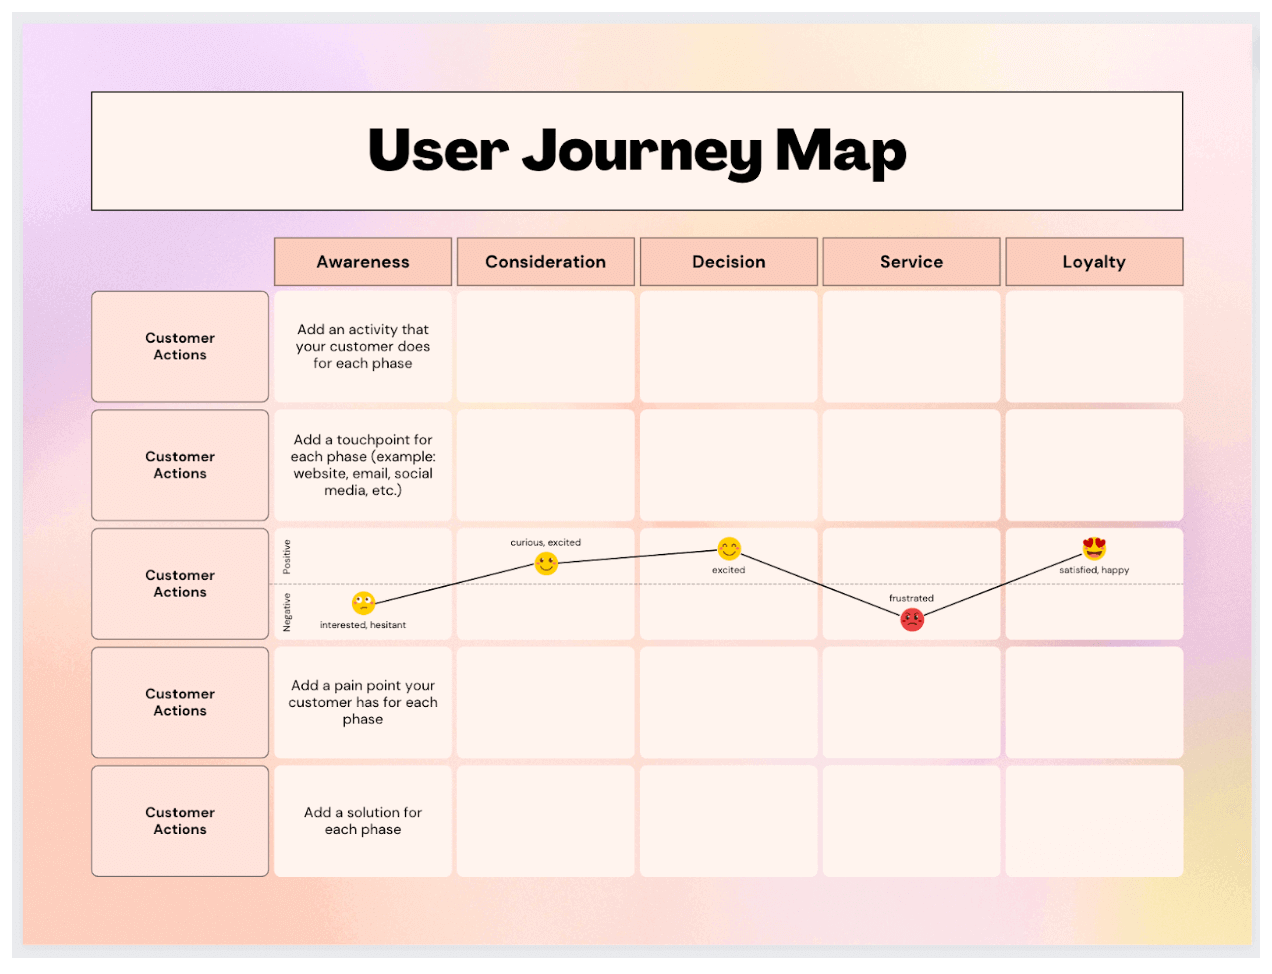
Here’s an example of a user journey map template from Canva:
2. Define your persona and scenario
Each user journey map you create should represent a specific user journey from the perspective of a specific user persona. So: determine which UX persona will feature in your journey map, and what scenario they’re in. In other words, what goal or task are they trying to complete?
Add details of your persona and scenario at the top of your user journey map.
3. Outline key stages, actions, and touchpoints
Now it’s time to flesh out the user journey itself. First, consider the user scenario you’re conveying and think about how you can divide it into high-level phases.
Within each phase, identify the actions the user takes and the touchpoints they interact with.
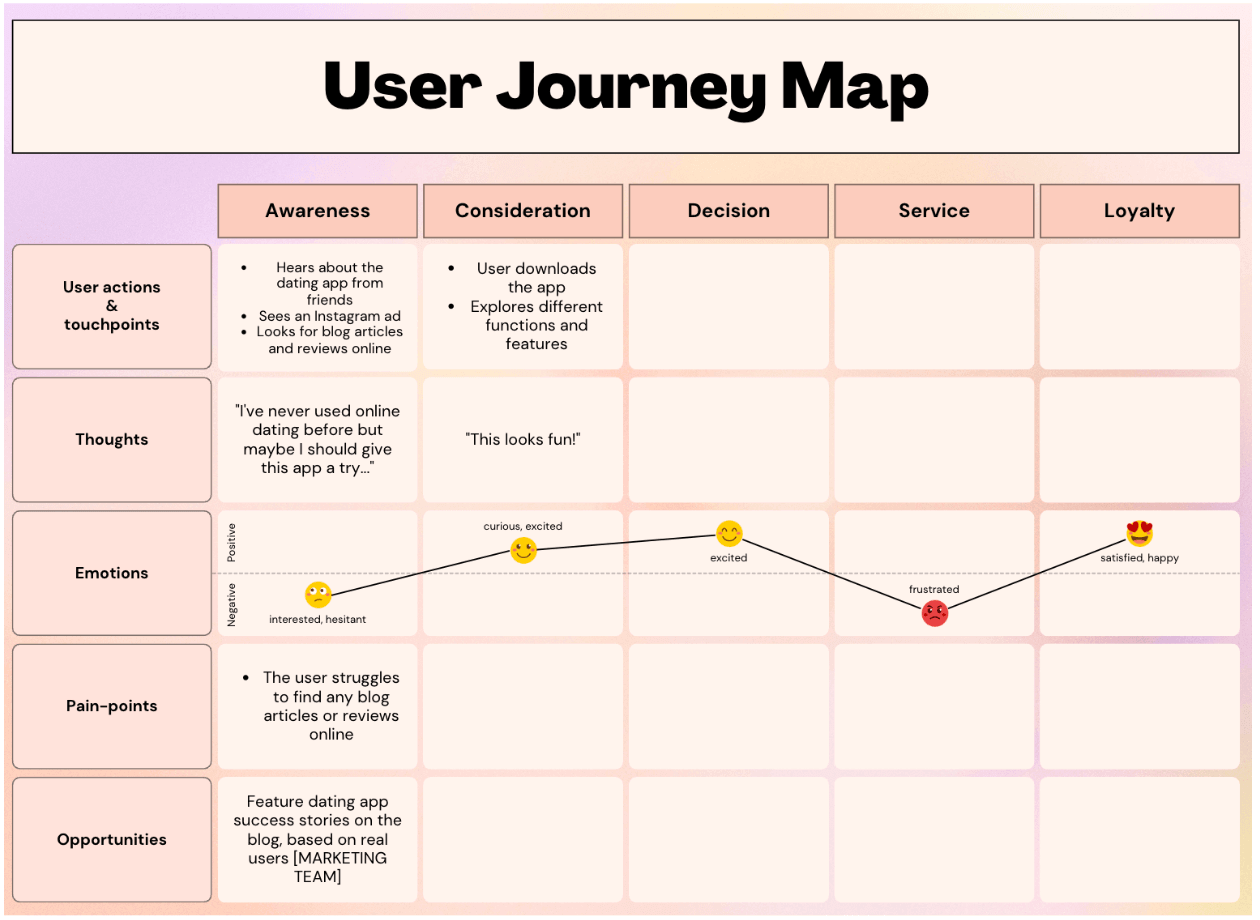
Take, for example, the scenario of signing up for a dating app. You might divide the process into the following key phases: Awareness, Consideration, Decision, Service, and Advocacy.
Within the Awareness phase, possible user actions might be: Hears about the dating app from friends, Sees an Instagram advert for the app, Looks for blog articles and reviews online.
4. Fill in the user’s thoughts, emotions, and pain-points
Next, step even further into your user’s shoes to imagine what they may be thinking and feeling at each stage, as well as what pain-points might get in their way.
To continue with our dating app example, the user’s thoughts during the Awareness phase might be: “I’ve never used online dating before but maybe I should give this app a try…”
As they’re new to online dating, they may be feeling both interested and hesitant.
While looking for blog articles and reviews, the user struggles to find anything helpful or credible. This can be added to your user journey map under “pain-points”.
5. Identify opportunities
Now it’s time to turn your user pain-points into opportunities. In our dating app example, we identified that the user wanted to learn more about the app before signing up but couldn’t find any useful articles or reviews online.
How could you turn this into an opportunity? You might start to feature more dating app success stories on the company blog.
Frame your opportunities as action points and state who will be responsible for implementing them.
Here we’ve started to fill out the user journey map template for our dating app scenario:
Repeat the process for each phase in the user journey until your map is complete.
6. Define action points and next steps
User journey maps are great for building empathy and getting you to see things from your user’s perspective. They’re also an excellent tool for communicating with stakeholders and creating a shared understanding around how different users experience your product.
Once your user journey map is complete, be sure to share it with all key stakeholders and talk them through the most relevant insights.
And, most importantly, turn those insights into clear action points. Which opportunities will you tap into and who will be involved? How will your user journey maps inform the evolution of your product? What are your next steps?
Customer journey maps in UX: the takeaway
That’s a wrap for user journey maps! With a user journey map template and our step-by-step guide, you can easily create your own maps and use them to inspire and inform your product design process.
For more how-to guides, check out:
- The Ultimate Guide to Storyboarding in UX
- How to Design Effective User Surveys for UX Research
- How to Conduct User Interviews

